
Struggling with a broken washer in your Marlboro home can disrupt daily routines and cause stress. Immediate action is crucial because a faulty appliance often leads to leaks or electrical hazards if left unchecked. This guide offers step-by-step repair instructions to help you safely diagnose, fix, and test your washing machine, reducing the risk of injury and preventing costly service calls.
Table of Contents
- Step 1: Prepare Your Washer For Safe Repair
- Step 2: Identify Common Washer Problems Quickly
- Step 3: Remove Faulty Parts With Care
- Step 4: Install Replacement Parts Correctly
- Step 5: Test Your Washer For Proper Function
Quick Summary
| Key Point | Explanation |
|---|---|
| 1. Disconnect Power and Water | Unplug the washer and shut off water valves to prevent electrical shock and leaks during repair. |
| 2. Identify Common Symptoms Early | Recognizing signs like unusual noises or slow draining can help determine if repairs are DIY or need professional help. |
| 3. Use Proper Tools for Part Removal | Gather tools like gloves and lubricants, and remove parts carefully to avoid causing further damage to the washer. |
| 4. Ensure Correct Part Installation | Verify compatibility of replacement parts and follow manufacturer instructions to prevent future malfunctions. |
| 5. Conduct Thorough Post-Repair Testing | Run empty cycles and check various settings to confirm that the washer functions properly after repairs. |
Step 1: Prepare Your Washer for Safe Repair
Safety is paramount when preparing for a washer repair in your Marlboro home. Before diving into any maintenance work, you’ll need to systematically disconnect and secure your washing machine to prevent electrical or water-related accidents.
Begin by unplugging the washer from its electrical outlet. This critical first step eliminates any risk of electrical shock. Next, locate and turn off the water supply valves connected to the machine – typically found behind the washer or in your home’s utility area. These valves control water flow and prevent unexpected leaks during your repair process.
Here are the essential preparation steps:
- Disconnect electrical power completely
- Shut off both hot and cold water supply valves
- Clear the area around your washer for easy access
- Gather necessary repair tools beforehand
- Place a towel or shallow pan underneath water connections to catch potential drips
Proper preparation reduces the risk of injury and potential water damage during washer repairs.
Pro tip: Always keep your washer’s user manual nearby during repairs for specific model guidance and component identification.
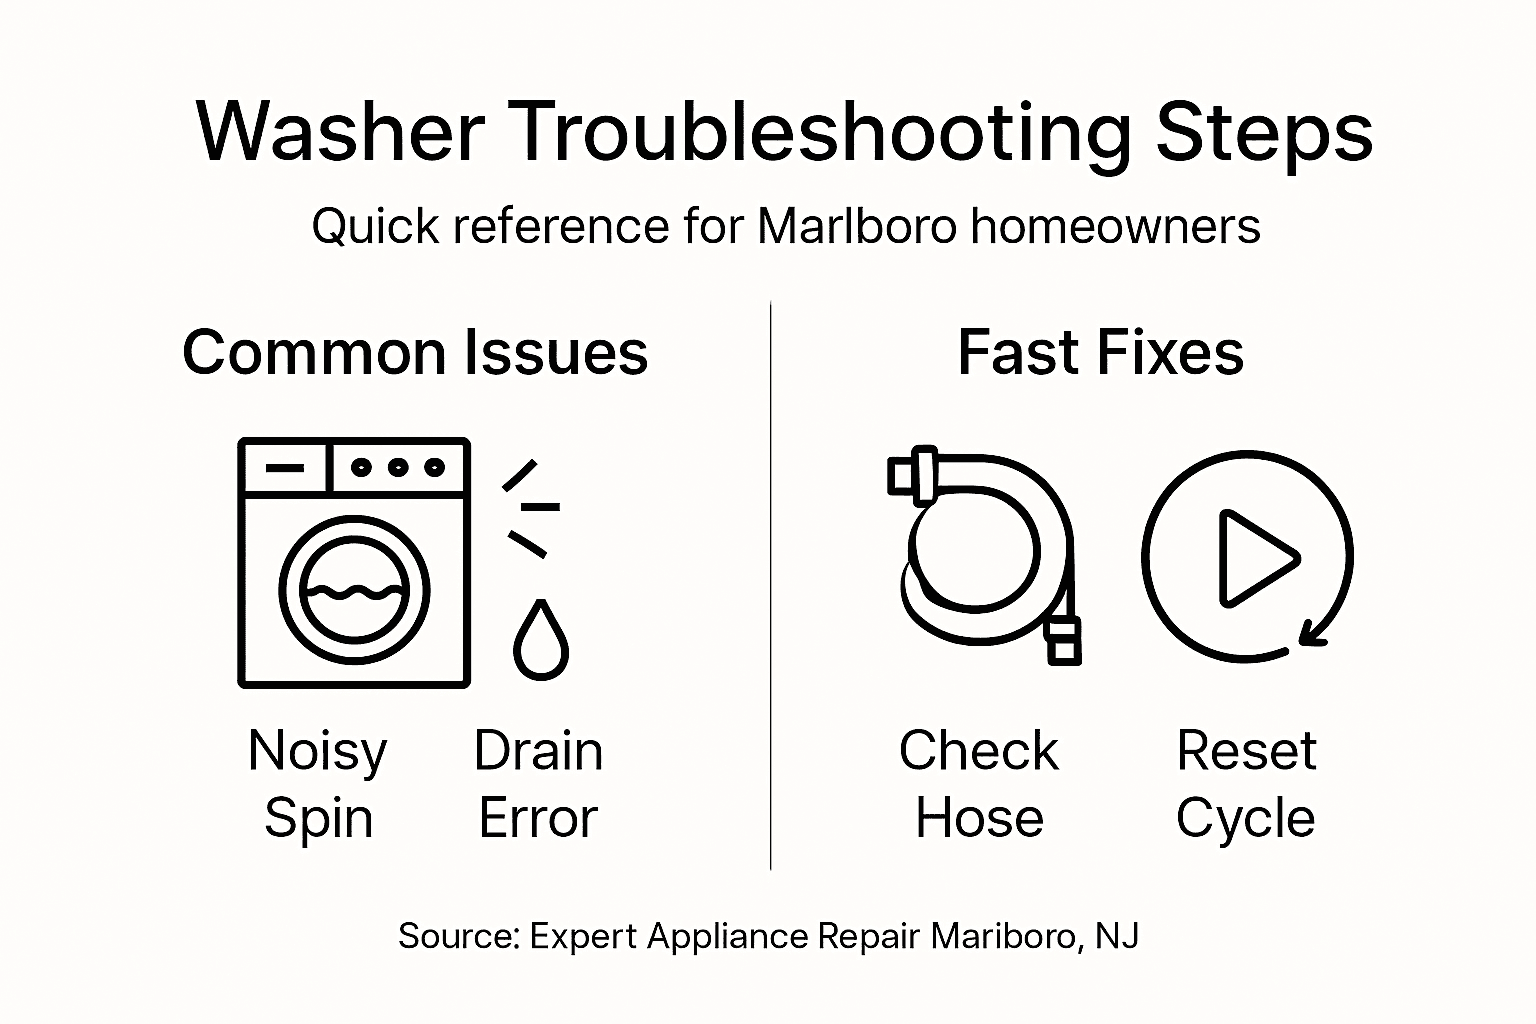
Step 2: Identify Common Washer Problems Quickly
Understanding the early warning signs of washer trouble can save you time, money, and prevent more serious damage to your appliance. By learning to recognize common washer symptoms, you can quickly determine whether a repair is a simple DIY fix or requires professional intervention.
When diagnosing washer issues, pay close attention to these potential problem indicators:
- Unusual noises during wash or spin cycles
- Water not draining completely
- Vibration or excessive movement during operation
- Clothes remaining wet after the spin cycle
- Error codes displayed on the control panel
Identifying washer problems early can prevent costly repairs and extend your appliance’s lifespan.
Some specific symptoms to watch for include motor struggles, which might manifest as grinding sounds or hesitation during spinning, water inlet valve problems that cause slow filling, and potential pump issues indicated by standing water in the drum. Each of these signs points to a different potential mechanical breakdown that requires targeted troubleshooting.
For quick reference, here’s a table summarizing common washer symptoms and their likely causes:
| Symptom | Likely Cause | Suggested Action |
|---|---|---|
| Unusual noises | Worn bearings or motor | Inspect and replace |
| Slow water filling | Faulty inlet valve | Check valve, replace |
| Poor draining | Clogged pump or hose | Clean pump, inspect hose |
| Excessive vibration | Uneven load or damaged shock absorbers | Redistribute load, replace parts |
| Error codes | Electronic control issues | Consult manual, reset or replace |
Pro tip: Keep a maintenance log documenting each unusual washer behavior to help identify recurring patterns and assist repair technicians.
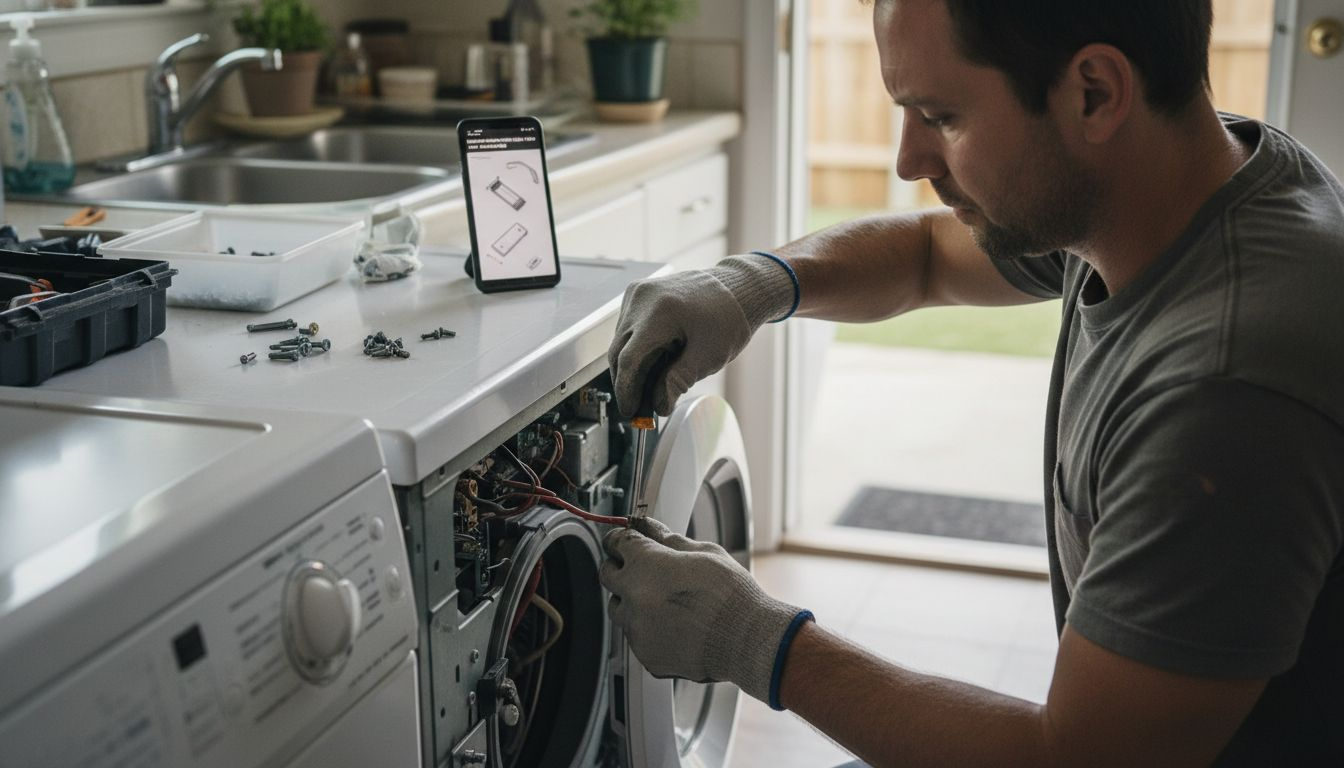
Step 3: Remove Faulty Parts with Care
Removing faulty washer parts requires precision, patience, and careful technique to prevent additional damage to your appliance. Safely extracting stuck components demands methodical approach and specific tools to minimize potential risks during the repair process.
Before beginning any part removal, gather these essential tools and prepare your workspace:
- Protective work gloves
- Adjustable wrench
- Penetrating lubricant
- Rubber mallet
- Clean workspace with good lighting
Careful part removal prevents costly mistakes and potential appliance damage.
When tackling specific components like the agitator or pump, use gentle but firm techniques. Avoid excessive force that might crack plastic parts or damage surrounding mechanisms. Apply steady pressure when using tools, and if a part seems extremely resistant, pause and reassess rather than risking breakage. Some components might require specialized extraction techniques, such as using a 2×4 board for leverage or carefully applied penetrating lubricant to loosen seized connections.
Pro tip: Take photographs of the component placement before removal to ensure correct reinstallation.
Step 4: Install Replacement Parts Correctly
Successful washer repair hinges on precise part installation that matches your specific model’s requirements. Carefully installing replacement components demands meticulous attention to detail and systematic approach to prevent future malfunctions.
Before beginning installation, verify these critical preparation steps:
- Check part compatibility with your washer model
- Inspect new component for any manufacturing defects
- Clean mounting surfaces thoroughly
- Gather all necessary tools beforehand
- Review manufacturer’s installation instructions
Precise installation prevents recurring appliance problems and potential system failures.
When installing specific components like motors or control boards, align connections carefully and ensure electrical and water line connections are secure. Use gentle but firm pressure when securing mounting brackets, and double-check that all fasteners are tightened to the manufacturer’s recommended torque specifications. Pay special attention to electrical connections, making sure wires are properly seated and not pinched or stretched.
Pro tip: Use a torque screwdriver to ensure consistent and accurate fastener tightening during part installation.
Step 5: Test Your Washer for Proper Function
After completing repairs, thoroughly testing your washer ensures all components function correctly and prevents potential future breakdowns. Comprehensive washer performance testing involves running diagnostic cycles and carefully monitoring the machine’s operation across multiple wash settings.
Follow these essential testing steps to verify your washer’s functionality:
- Run a complete empty cycle first
- Check water inlet and drainage performance
- Listen for unusual noises during operation
- Verify spin cycle effectiveness
- Monitor temperature and water levels
- Test all wash cycle settings
A thorough test cycle reveals potential issues before they become serious problems.
Begin with an empty load to minimize risks, selecting different cycle types to ensure comprehensive functionality. Pay close attention to water fill rates, spinning performance, and any unexpected sounds or vibrations. If the washer completes cycles smoothly without leaks, unusual noises, or error messages, you can be confident in your repair work. Should any irregularities appear, carefully review your installation steps or consider consulting a professional technician.
Here’s how proper testing verifies different washer functions after a repair:
| Test Step | What It Confirms | Potential Issue Spotted |
|---|---|---|
| Empty cycle run | All systems operational | Immediate leaks or errors |
| Water inlet check | Valve and hose integrity | Slow fill or blockage |
| Spin cycle observation | Motor and balance function | Excess movement or noise |
| Multiple cycle selection | Electronic controls | Non-responsive panel |
Pro tip: Record a video of the washer’s test cycle to help diagnose any subtle issues that might be difficult to remember or describe later.
Get Expert Help for Your Marlboro Washer Repairs Today
If your washer is showing signs like unusual noises, poor draining, or error codes, you know how frustrating and urgent these issues can be. This article helped you understand the importance of safely preparing your machine, identifying problems early, removing faulty parts carefully, installing replacements correctly, and testing your washer thoroughly. However, sometimes DIY repairs are not enough or you want to avoid risks like water damage or electrical hazards.

For fast, reliable service in Marlboro and surrounding Monmouth County, trust Expert Appliance Repair. As a family-owned business since 1988, we specialize in same-day appliance repairs backed by decades of experience. Whether you need help with washers or other household appliances, our professional technicians deliver transparent pricing and guaranteed satisfaction. Explore more about our repair offerings in the Appliance Archives – Expert Appliance to learn how we address common appliance challenges. Don’t wait for minor problems to become major repairs. Contact us now at Expert Appliance Repair and get your washer running smoothly again.
Frequently Asked Questions
How do I ensure my washer is safe to repair?
To ensure safety during washer repairs, begin by unplugging the machine and shutting off both the hot and cold water supply valves. Clear the area around your washer for safe access, and gather any necessary repair tools before starting.
What common symptoms should I look for when diagnosing washer problems?
Look for unusual noises, water not draining completely, excessive vibration, and error codes on the control panel. Recognizing these symptoms early can help you determine whether the issue is a simple fix or requires professional help.
What steps should I take to remove faulty parts from my washer?
When removing faulty parts, gather essential tools like protective gloves, a wrench, and a rubber mallet. Use gentle techniques, avoid excessive force, and apply penetrating lubricant if necessary to assist in loosening stuck components.
How can I ensure new parts are installed correctly in my washer?
To install new parts correctly, first verify they are compatible with your specific washer model. Follow the manufacturer’s installation instructions closely, clean mounting surfaces, and ensure all connections are secure to prevent future malfunctions.
What should I do after completing washer repairs?
After completing repairs, run a complete empty cycle to test the washer’s functionality. Monitor for leaks, unusual sounds, and ensure all wash settings work correctly to confirm that the repairs were successful.
How do I keep track of my washer’s maintenance and repairs?
Keep a maintenance log documenting each repair and any unusual behavior observed in your washer. This can help identify recurring issues and provide valuable information if you need to consult a professional technician.