
When your refrigerator starts making strange noises at 2 a.m. or your dryer takes twice as long to finish a cycle, you’re facing more than just an inconvenience. Appliance failures disrupt daily routines, threaten food safety, and can lead to expensive emergency repairs if left unchecked. The good news? Most major appliance problems give early warning signs before they escalate into costly breakdowns. This guide teaches you how to recognize these red flags, prepare for safe inspection, and take action before minor issues become major headaches. By learning to spot problems early, you’ll save money, reduce stress, and keep your household running smoothly.
Table of Contents
- Key takeaways
- Understanding common signs of appliance problems
- Preparing to identify appliance problems safely and effectively
- Step-by-step guide to spotting appliance problems
- Troubleshooting common mistakes and verifying appliance functionality
- Get expert appliance repair and maintenance in Marlboro
- FAQ
Key Takeaways
| Point | Details |
|---|---|
| Early warning signs | Unusual noises, leaks, and performance changes are early warnings that signal appliance trouble before a major failure. |
| Safety first | Always unplug or switch off power and shut the gas supply before inspecting to protect yourself and the appliance. |
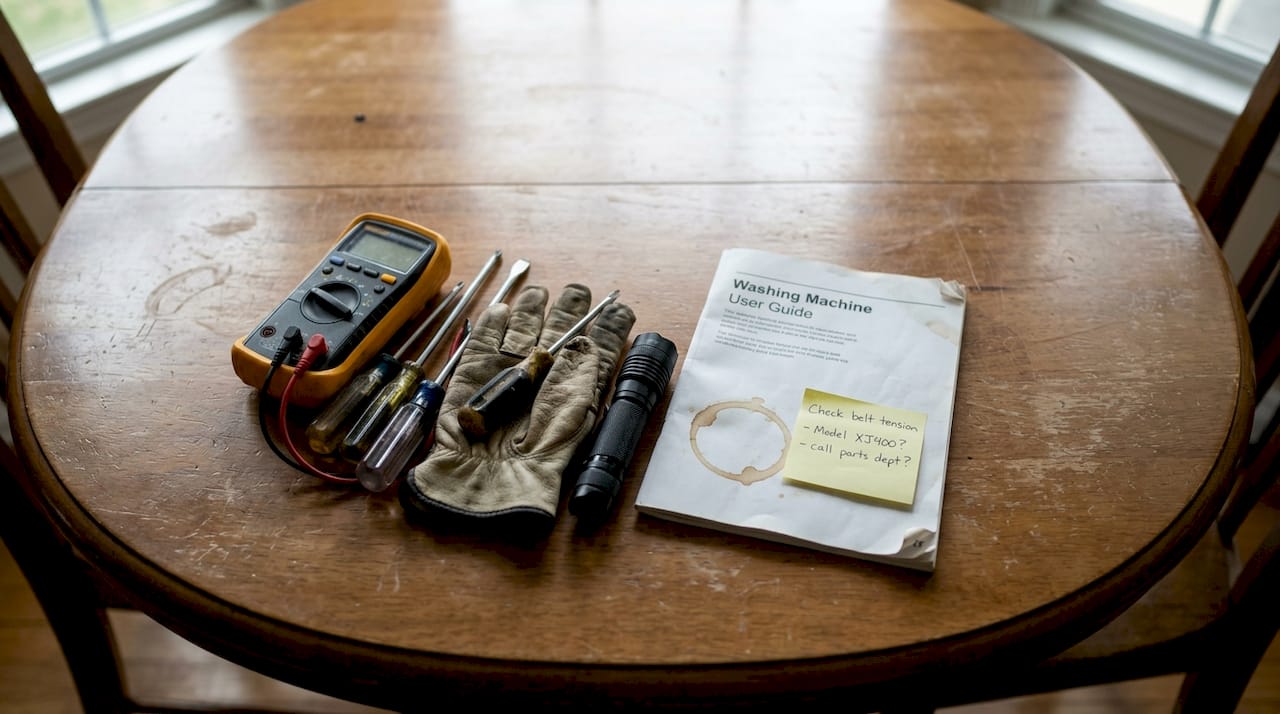
| Right tools | Gather a basic toolkit including a digital multimeter, flashlight, screwdriver set, needle nose pliers, work gloves, and safety glasses to diagnose problems safely. |
| Manual and model knowledge | Consult the user manual or manufacturer online PDFs for normal sounds, maintenance schedules, and model specific issues to improve diagnosis accuracy. |
Understanding common signs of appliance problems
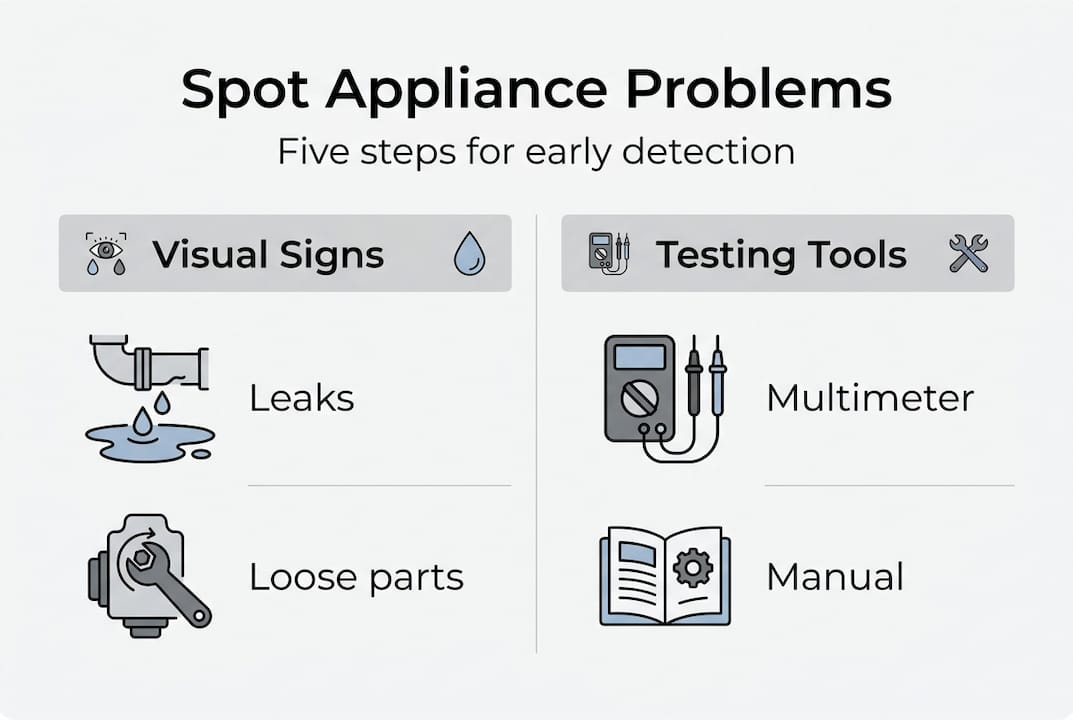
Your appliances communicate their health status through various symptoms, and learning this language helps you catch problems before they spiral out of control. The first indicator many homeowners notice is sound. Grinding noises from your washing machine, buzzing from the refrigerator compressor, or squealing from dryer bearings all signal mechanical wear that needs attention. These unusual noises indicate appliance malfunction requiring prompt investigation.
Visual cues provide equally important clues about appliance health. Water pooling beneath your dishwasher, refrigerator, or washing machine points to seal failures, hose damage, or drain blockages. Rust spots on appliance exteriors suggest moisture problems that could damage internal components. Scorch marks near electrical connections warn of overheating circuits that pose fire hazards.
Your nose can detect problems your eyes might miss. Burning smells from any appliance demand immediate attention, as they often indicate electrical shorts or overheating motors. Musty odors from washing machines or dishwashers reveal mold growth from poor drainage or seal problems. Gas appliances emitting unusual smells require professional inspection right away for safety reasons.
Performance changes offer the most reliable early warning system:
- Refrigerators that can’t maintain proper temperatures
- Ovens that heat unevenly or take longer to preheat
- Washing machines that leave clothes soaking wet
- Dryers requiring multiple cycles to dry loads
- Dishwashers leaving dishes dirty or spotted
These symptoms rarely resolve themselves and typically worsen over time, making early detection crucial for preventing complete appliance failure.
Preparing to identify appliance problems safely and effectively
Before you start poking around your malfunctioning appliance, proper preparation protects both you and your equipment. Safety must come first when dealing with devices that combine electricity, water, and moving parts. Always unplug appliances before inspection, or shut off the circuit breaker if the plug is inaccessible. For gas appliances, turn off the gas supply valve before any examination.
Gathering the right tools makes diagnosis more accurate and efficient. Your basic toolkit should include:
- Digital multimeter for testing electrical components
- Flashlight or headlamp for inspecting dark interior spaces
- Screwdriver set with multiple head types
- Needle-nose pliers for accessing tight spaces
- Work gloves and safety glasses for protection
Your appliance’s user manual contains invaluable troubleshooting information specific to your model. These guides explain normal operating sounds, maintenance schedules, and common issues with solutions. If you’ve misplaced the physical manual, most manufacturers provide PDF versions on their websites using your model number. Understanding your appliance’s normal behavior helps you recognize when something goes wrong.
Knowledge about your specific appliance type prevents misdiagnosis. Proper preparation with basic tools and safety steps forms the foundation for effective troubleshooting. Research common problems for your appliance brand and model online, as certain issues affect specific models more frequently than others.
Pro Tip: Take photos of your appliance’s interior and connections before disassembling anything. These reference images prove invaluable when reassembling components or explaining problems to repair technicians.
Recognize your limitations and know when professional help becomes necessary. Electrical work beyond simple testing, refrigerant system repairs, and gas line issues require licensed technicians. Complex electronic control boards often need specialized diagnostic equipment. If you feel uncertain about any step or encounter unexpected complications, stop and call an expert rather than risk injury or further damage.
Step-by-step guide to spotting appliance problems
A methodical approach to appliance inspection yields better results than random poking and prodding. Following a structured approach helps accurately identify issues while minimizing risks. Start by ensuring complete power disconnection, then proceed through these systematic steps.
Step one involves external examination. Walk around the appliance looking for obvious damage, loose parts, or disconnected components. Check power cords for fraying, plugs for burn marks, and exterior panels for warping or discoloration. Verify that the appliance sits level, as tilted positions cause drainage problems in dishwashers and washing machines or cooling issues in refrigerators.
Step two requires you to access visible internal areas without full disassembly. Remove lint filters, drain filters, and any user-accessible panels. Clean these components thoroughly, as buildup often causes performance problems that mimic mechanical failure. Inspect visible hoses, belts, and seals for cracks, wear, or looseness.
Step three involves operational testing with careful observation. Plug the appliance back in and run it through a cycle while watching and listening closely. Note exactly when unusual sounds occur during the cycle. Watch for leaks, excessive vibration, or irregular movements. Time how long cycles take compared to normal operation.
Step four applies to electrical testing when safe and appropriate. Use your multimeter to check power supply at the outlet, verifying proper voltage. Test heating elements, thermostats, and motors according to manufacturer specifications found in service manuals. Document all readings for comparison with normal values.
Step five focuses on documentation and decision making. Write down every symptom, measurement, and observation. Compare your findings against known problems for your appliance type. Determine whether the issue requires immediate professional repair, can wait for scheduled service, or might resolve with simple maintenance.
| Inspection Area | What to Check | Tools Needed |
|---|---|---|
| Power supply | Voltage at outlet, cord condition | Multimeter, visual inspection |
| Moving parts | Belts, pulleys, bearings, motors | Flashlight, manual rotation test |
| Water systems | Hoses, pumps, valves, seals | Visual inspection, leak test |
| Heating elements | Continuity, resistance values | Multimeter, manufacturer specs |
| Control systems | Display function, button response | Operational test, error codes |
Pro Tip: Many modern appliances store error codes that pinpoint specific malfunctions. Consult your manual for instructions on accessing diagnostic mode, which can reveal problems invisible during normal operation.
Troubleshooting common mistakes and verifying appliance functionality
Even experienced DIYers fall into diagnostic traps that delay proper repairs or lead to unnecessary part replacements. The most frequent mistake involves treating symptoms rather than identifying root causes. That puddle under your refrigerator might seem like a door seal problem, but often results from a clogged defrost drain. Replacing the seal wastes money and leaves the real problem unsolved.
Another common error is dismissing intermittent symptoms as unimportant. Appliances that work sometimes but fail other times often have loose connections, failing components, or control board issues that worsen over time. Document these irregular behaviors carefully, noting patterns related to cycle stages, ambient temperature, or usage frequency.
Many homeowners attempt quick fixes without proper diagnosis, like resetting breakers repeatedly when appliances trip them. This behavior ignores serious electrical problems that could cause fires. Similarly, continuing to use appliances that smell like burning or show sparking creates dangerous situations requiring immediate professional attention.
Comparing your symptoms against urgency levels helps prioritize repair timing:
- Immediate attention: Burning smells, sparking, gas odors, complete power failure
- Urgent repair: Major leaks, no cooling/heating, won’t start, loud grinding
- Schedule soon: Minor leaks, longer cycles, reduced efficiency, unusual sounds
- Monitor closely: Slight performance decline, occasional odd behavior, minor cosmetic issues
This urgency assessment prevents unnecessary repairs while catching serious problems before they escalate.
Verification separates actual problems from false alarms. After identifying a potential issue, test your appliance multiple times under different conditions. A washing machine that vibrates excessively might simply have an unbalanced load rather than broken suspension. A refrigerator that seems warm might just need several hours to recover after being left open.
Confirm your diagnosis by:
- Running complete cycles multiple times
- Testing with different load sizes or settings
- Measuring actual performance against specifications
- Checking whether cleaning or minor adjustments resolve symptoms
- Consulting online forums for similar problems with your model
Document everything with photos, videos, and written notes. This evidence helps repair technicians diagnose problems faster when professional service becomes necessary. Detailed records also prove valuable for warranty claims or when comparing quotes from multiple service providers.
Avoid the temptation to force stuck parts, over-tighten connections, or bypass safety switches. These actions often transform minor repairs into major overhauls. If something doesn’t move easily, apply appropriate lubricant and gentle pressure rather than brute force. If a safety mechanism prevents operation, find out why rather than defeating it.
Get expert appliance repair and maintenance in Marlboro
When your diagnostic efforts reveal problems beyond simple fixes, Expert Appliance brings over 35 years of experience serving Marlboro and Monmouth County homeowners. Our technicians handle appliance repair for top brands including Whirlpool, GE, Samsung, LG, and more, with same-day service available for urgent issues. We understand that appliance problems disrupt your daily life, which is why we offer 24/7 emergency support with upfront pricing and no hidden fees.

Our comprehensive appliance and vacuum repair services cover refrigerators, washers, dryers, ovens, dishwashers, and all major household equipment. Beyond repairs, we help you implement appliance maintenance tips that prevent future breakdowns and extend equipment life. As a family-owned business established in 1988, we’ve built our reputation on reliable service, professional expertise, and guaranteed customer satisfaction throughout Monmouth County.
FAQ
How can I tell if my appliance noise indicates a serious problem?
Persistent grinding, squealing, or buzzing noises usually signal serious issues requiring professional attention. These sounds often indicate worn bearings, failing motors, or loose components that will worsen without repair. Transient or minor sounds during specific cycle phases may be less urgent but should be monitored for frequency and volume increases. If the noise changes appliance performance or occurs continuously, schedule repair service promptly to prevent complete failure.
What basic tools do I need to safely inspect household appliances?
A multimeter, screwdriver set, flashlight, gloves, and safety glasses form the foundation for safe appliance inspection. The multimeter tests electrical components and power supply, while screwdrivers access panels and components. Always unplug appliances before inspection to avoid electric shock, and wear protective equipment when handling sharp edges or working in tight spaces. Additional tools like needle-nose pliers and a camera for documentation enhance your diagnostic capabilities.
When should I call a professional for appliance repair instead of DIY?
If the appliance shows persistent performance issues, electrical problems, or if you lack proper tools or expertise, call a professional immediately. Complex repairs involving refrigerant systems, gas lines, or electronic control boards require specialized training and equipment. Avoid DIY for safety-critical problems like burning smells, sparking, or gas odors. Professional technicians complete repairs faster and more safely while providing warranties on their work, often making professional service more cost-effective than trial-and-error DIY attempts.
How often should appliance inspections be performed to catch problems early?
Perform inspections at least quarterly, or follow manufacturer recommendations for your appliance types. Regular checks reduce unexpected breakdowns and extend appliance life by catching minor issues before they escalate. High-use appliances like refrigerators and washing machines benefit from monthly quick checks of seals, hoses, and filters. Creating an appliance maintenance schedule helps you stay consistent with inspections and routine maintenance tasks, preventing most common appliance problems before they require expensive repairs.
Recommended
- How to Diagnose Appliances for Quick Home Repairs – Expert Appliance
- How to Prepare for Appliance Service and Ensure Fast Repairs – Expert Appliance
- Appliance Troubleshooting: Solutions from Expert Appliance
- Master the Appliance Service Workflow for Fast Repairs – Expert Appliance
- Emergency Coffee Machine Repair | Same Day Service | Devon Somerset