TL;DR:
- Many dryer noises indicate simple issues like worn belts, pulleys, or debris that homeowners can fix.
- Proper maintenance, such as cleaning vents and inspecting rollers, reduces noise and prolongs dryer life.
- Persistent or burning smells require professional repair to prevent further damage or safety hazards.
A loud dryer can throw off your entire evening. One minute you’re folding laundry, the next you’re hearing thumping, squealing, or grinding that stops you cold. For Marlboro, NJ homeowners, that noise isn’t just annoying—it’s often a warning sign that something inside your dryer needs attention. The good news is that many noisy dryer problems are fixable without a service call, as long as you know what to look for. This guide walks you through diagnosing the noise, gathering the right tools, making the repair, and knowing exactly when it’s time to call a local pro.
Table of Contents
- Diagnosing your noisy dryer: What to check first
- Essential tools and parts: What you’ll need for repairs
- Step-by-step fixes for common noisy dryer problems
- When noise means trouble: Motor issues and when to call a pro
- Dryer noise prevention: Maintenance tips for Marlboro homeowners
- Our take: What most DIY dryer guides get wrong
- Need help? Fast, reliable dryer repair in Marlboro, NJ
- Frequently asked questions
Key Takeaways
| Point | Details |
|---|---|
| Start with simple checks | Most noisy dryers can be quickly assessed and sometimes fixed with basic troubleshooting. |
| Use proper tools and parts | Original parts and the right equipment make repairs easier and safer. |
| Know when to call a pro | Unusual noises or burning smells mean it’s time for expert repair. |
| Prevent future problems | Regular maintenance reduces noise and costly breakdowns. |
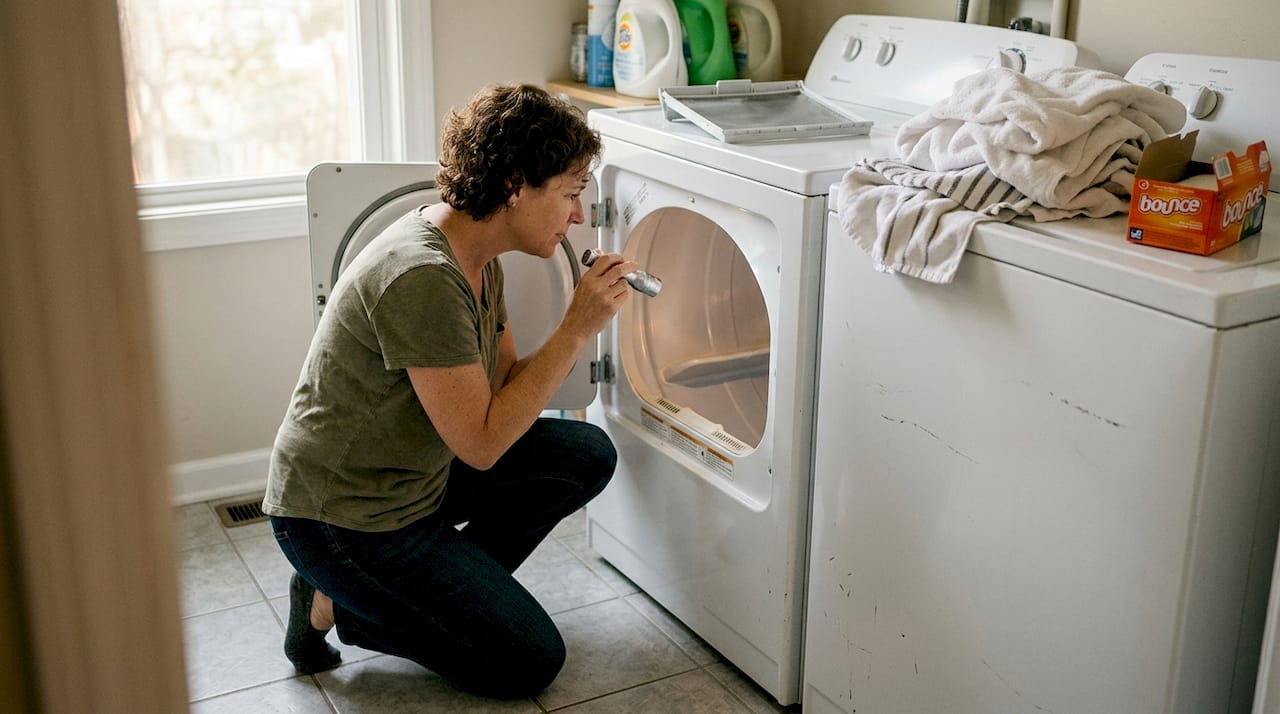
Diagnosing your noisy dryer: What to check first
Before you grab a screwdriver, spend five minutes on the basics. Many noisy dryer calls turn out to be simple fixes that take less time than the diagnostic itself. Start by understanding what the noise is telling you.
Different sounds point to different problems:
- Thumping or bumping: Usually a tangled load, worn drum rollers, or an uneven floor
- Squealing or squeaking: Often a worn drive belt, idler pulley, or dry drum glides
- Grinding: Points to drum bearings or foreign objects caught in the drum
- Rattling: Loose coins, buttons, or debris in the drum or lint trap
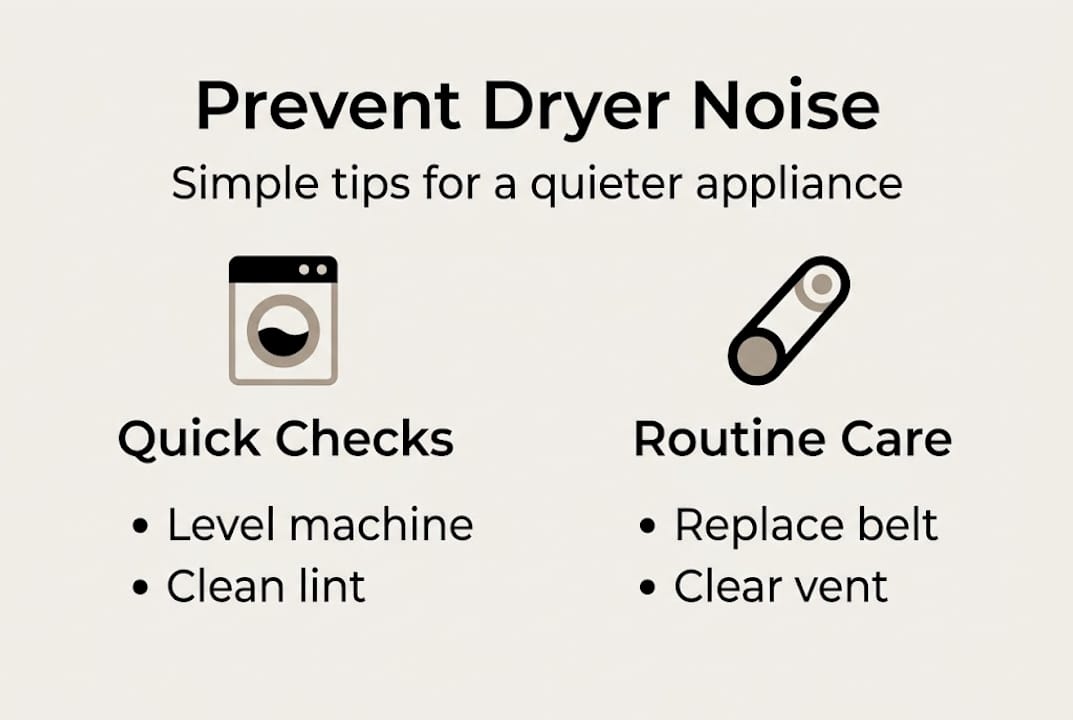
Once you’ve identified the sound, run through this quick checklist before opening anything up:
| Check | What to do | Why it matters |
|---|---|---|
| Dryer level | Use a bubble level, adjust feet | Uneven dryers thump and vibrate |
| Loose objects | Check pockets before loading | Coins and buttons cause rattling |
| Lint trap | Clean before every cycle | Clogged traps strain the motor |
| Vent hose | Inspect for kinks or blockages | Restricted airflow creates heat and noise |
| Load balance | Redistribute heavy items | Uneven loads cause thumping |
According to basic dryer troubleshooting, leveling the unit, removing foreign objects, cleaning the lint trap, and redistributing the load resolves a surprising number of noise complaints before any parts are touched.
Always unplug the dryer before inspecting interior components. This is non-negotiable. Gas dryers also require you to turn off the gas supply valve before opening the cabinet.
Pro Tip: Clean your dryer vent at least once a year using a long-handled vent brush. Lint buildup doesn’t just cause noise—it’s one of the leading causes of house fires. Our dryer efficiency tips cover vent maintenance in detail for Monmouth County homes.
If the basic checklist doesn’t solve it, use our dryer troubleshooting guide to go deeper into specific noise types before disassembling anything.
Essential tools and parts: What you’ll need for repairs
Before you start disassembling your dryer, gather the right tools and know your part options. Walking into a repair without the right equipment wastes time and risks damaging components that were fine to begin with.
Tools you’ll need:
- Phillips and flathead screwdrivers (various sizes)
- Putty knife or trim tool for releasing cabinet clips
- Needle-nose pliers
- A vacuum with a narrow attachment for lint removal
- Work gloves to protect against sharp sheet metal edges
- Multimeter for testing electrical components
- Smartphone or camera for photographing disassembly steps
Replacement parts to have on hand:
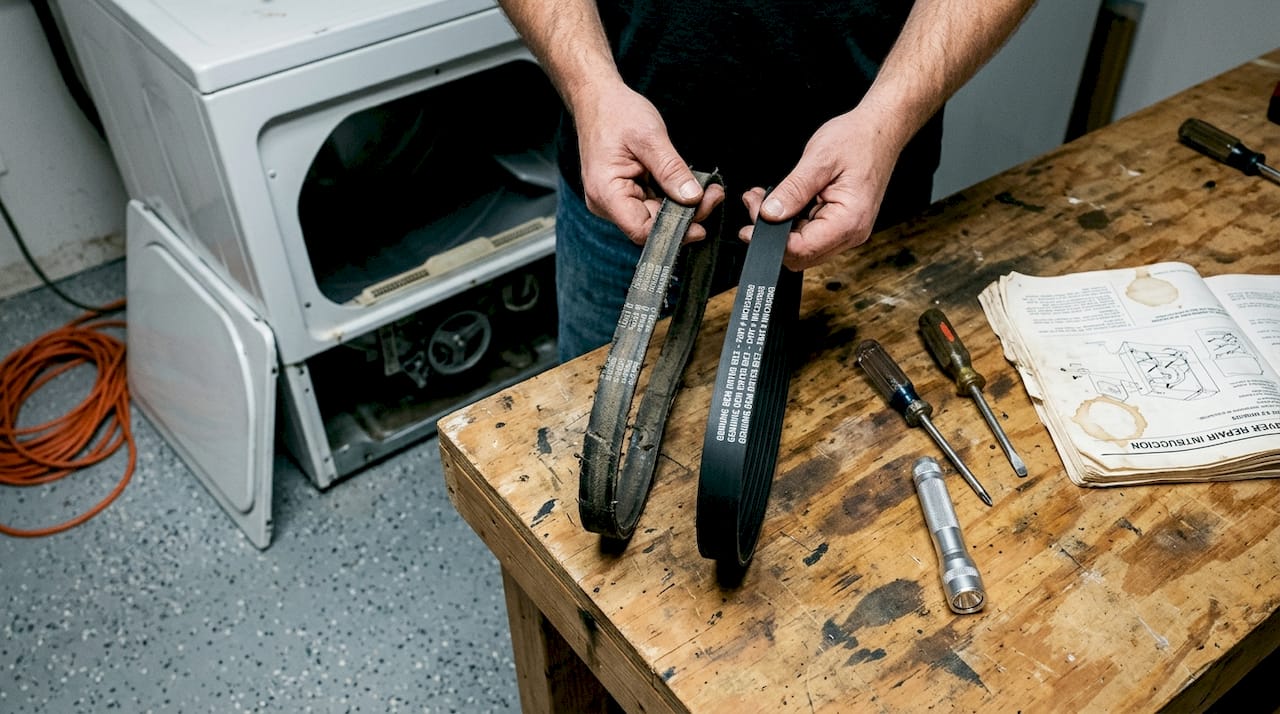
- Drive belt (most common wear item)
- Idler pulley (often replaced with the belt)
- Drum rollers or glides (support the drum’s rotation)
- Drum bearing (rear support, less common but important)
The big question most Marlboro homeowners face is whether to buy OEM (original equipment manufacturer) parts or generic alternatives. Here’s a straightforward comparison:
| Factor | OEM parts | Generic parts |
|---|---|---|
| Fit | Exact match for your model | May require adjustment |
| Durability | Tested to manufacturer specs | Varies by brand |
| Cost | Higher upfront | Lower upfront |
| Warranty | Often included | Rarely included |
| Availability | Model-specific | Widely available |
For a dryer you plan to keep for several more years, OEM parts are the smarter investment. Worn drive belts, idler pulleys, and drum glides are the most common sources of squealing and screeching, and replacing them with OEM components means you won’t be back inside the machine six months later.
For a step-by-step dryer repair walkthrough specific to Marlboro, NJ appliances, we’ve put together a detailed resource that covers the most popular brands in the area.
Step-by-step fixes for common noisy dryer problems
Now with tools and parts ready, follow this repair process step-by-step. Take your time, and don’t skip the safety steps.
- Unplug the dryer completely. For gas models, shut off the gas supply valve.
- Remove the lint trap and use your vacuum to clean the lint trap housing thoroughly.
- Release the top panel using a putty knife to press the spring clips near the front corners. Lift the panel back.
- Disconnect the door switch wires (photograph the connections first) and remove the front panel.
- Inspect the drive belt. It should wrap snugly around the drum and idler pulley. A cracked, frayed, or loose belt needs replacement.
- Check the idler pulley. Spin it by hand. It should rotate smoothly and quietly. Resistance or wobbling means it’s worn.
- Examine the drum glides and rollers. These small plastic or felt pieces support the drum’s edges. Flat spots or worn surfaces cause thumping and squeaking.
- Lubricate sparingly where allowed. Some bearings accept a small amount of 3-in-1 oil. Avoid over-lubricating, which attracts lint.
- Reassemble in reverse order, reconnecting all wires before closing panels.
- Run a short test cycle with a small load and listen carefully.
For squealing or screeching sounds, the fix is usually lubrication if wear is minor, or full part replacement if the component is visibly damaged.
Stop immediately if you smell burning plastic or rubber, see scorch marks, or notice sparks during reassembly. These are not DIY situations. Call a professional right away.
Pro Tip: Before removing any part, take a photo with your phone. It takes three seconds and saves you from a frustrating puzzle when it’s time to put things back together.
For more guidance on safe repairs, our appliance maintenance tips cover best practices for Monmouth County homeowners. If you’d rather leave it to the pros, our dryer repair services are available for fast scheduling.
When noise means trouble: Motor issues and when to call a pro
Sometimes, noise signals bigger trouble you shouldn’t tackle alone. Motor problems are less common than belt or pulley issues, but they’re far more serious and require a different approach.
Here’s how to tell mechanical noise apart from motor noise:
| Noise type | Likely source | DIY-friendly? |
|---|---|---|
| Squealing/squeaking | Belt, pulley, glides | Yes |
| Thumping | Drum rollers, load balance | Often yes |
| Humming with no drum spin | Motor or capacitor | No |
| Grinding with burning smell | Motor failure | No |
A failing motor often hums or grinds and may stop spinning the drum entirely. You can test motor continuity with a multimeter, looking for a reading between 2 and 5 ohms. Anything outside that range, or a seized motor that won’t turn by hand, means replacement is needed.
If you smell burning at any point, stop the dryer, unplug it, and do not run it again until a technician inspects it. Electrical fires in appliances can start fast.
Signs you need a Marlboro, NJ dryer professional:
- Noise continues after replacing belt, pulley, and glides
- Dryer runs but drum doesn’t spin
- You smell burning rubber, plastic, or electrical odor
- Visible scorch marks on internal components
- Dryer trips the circuit breaker repeatedly
- You’re not comfortable working with electrical components
Local repair services in Monmouth County like Expert Appliance offer fast response times and factory-authorized service, so you’re not waiting days for a fix. Ignoring motor issues also raises dryer overheating risks that go beyond appliance damage.
Dryer noise prevention: Maintenance tips for Marlboro homeowners
Fixing your dryer is great, but preventing the next noise is even better. A few simple habits each year can add years to your appliance’s life and keep your laundry routine running smoothly.
Annual maintenance checklist for Marlboro homeowners:
- Clean the lint trap before every single cycle, not just occasionally
- Deep-clean the vent duct from the back of the dryer to the exterior wall once a year
- Inspect drum rollers for flat spots or cracks during your annual vent cleaning
- Check that the dryer sits level on the floor and adjust the feet if needed
- Avoid overloading. Heavy loads strain rollers, belts, and the motor faster than anything else
- Listen for changes in sound after every few cycles. Early noise is easier and cheaper to fix
Statistic to know: According to repair data, annual maintenance tasks like cleaning vents, balancing loads, and inspecting rollers are the most effective way to prevent the wear patterns that lead to noisy dryers and costly part replacements. Using OEM parts during any repair also extends the overall service life of the appliance.
For Marlboro homeowners, the local climate and typical household usage patterns mean dryers work hard year-round. Staying ahead of maintenance is far less expensive than emergency repairs. Our NJ appliance care tips include a full seasonal checklist built for homes in this area.
Our take: What most DIY dryer guides get wrong
Most DIY dryer repair content online treats every noisy dryer like a simple belt swap. The truth is more complicated, and some of that advice creates real risk for homeowners who follow it without context.
The biggest gap we see is that guides rarely tell you when to stop. They walk you through disassembly confidently, then leave you on your own when you find something unexpected inside. That’s where mistakes happen, and where a small problem becomes a bigger one.
Generic parts are another area where popular advice falls short. Saving $15 on a non-OEM idler pulley sounds smart until it fails six months later and you’re back inside the machine again. The importance of regular appliance maintenance isn’t just about cleaning. It’s about using quality components that actually last.
Our honest recommendation: handle the basics yourself, but know your limits. Marlboro homeowners who call a local pro at the right moment save money overall, because they avoid compounding a mechanical problem into an electrical one. Speed and safety matter more than saving a service fee.
Need help? Fast, reliable dryer repair in Marlboro, NJ
If tackling your noisy dryer feels overwhelming, Marlboro’s local experts can help. At Expert Appliance, we’ve been serving Monmouth County homeowners since 1988 with same-day service and upfront pricing you can trust.

Whether your dryer is squealing, grinding, or just refusing to cooperate, our technicians diagnose and fix the problem fast. We work on all major appliance brands we repair, so no matter what’s in your laundry room, we’ve got you covered. Explore our full range of appliance and vacuum repair services or visit Expert Appliance to schedule your appointment today. Don’t let a noisy dryer turn into a bigger problem.
Frequently asked questions
What is the most common cause of a noisy dryer?
Worn drive belts, drum rollers, or idler pulleys are the most frequent reasons for dryer noise, and they’re usually affordable to replace.
How do I know if my dryer needs a professional repair?
If the noise continues after basic cleaning and part replacement, you smell burning, or you hear humming or grinding with no drum movement, call a Marlboro appliance expert.
Can a noisy dryer cause further damage if ignored?
Yes. Running a noisy dryer puts extra stress on connected components, and motor failure or electrical damage can result from ignoring early warning sounds.
What maintenance prevents dryer noise?
Clean lint traps and vents every year, inspect rollers for wear, and avoid overloading your dryer to prevent the noise-causing wear patterns that lead to costly repairs.
Recommended
- Mastering Washer & Dryer Repair Techniques: A Guide for Homeowners – Expert Appliance
- 7 proven ways to prevent appliance damage and extend lifespan – Expert Appliance
- 7 Essential Washer and Dryer Care Tips for Homeowners – Expert Appliance
- Preventing appliance breakdowns: 5 tips for NJ homeowners – Expert Appliance