When your refrigerator stops cooling or your dryer refuses to start, the frustration can turn a normal day in Marlboro, NJ into a race against time. Quick action matters because unresolved appliance issues might lead to electrical hazards or even fire risks. Following expert safety measures and diagnostic steps recommended by sources like the Electrical Safety Foundation International and the U.S. Fire Administration helps homeowners protect their families and homes while getting to the heart of appliance problems fast.
Table of Contents
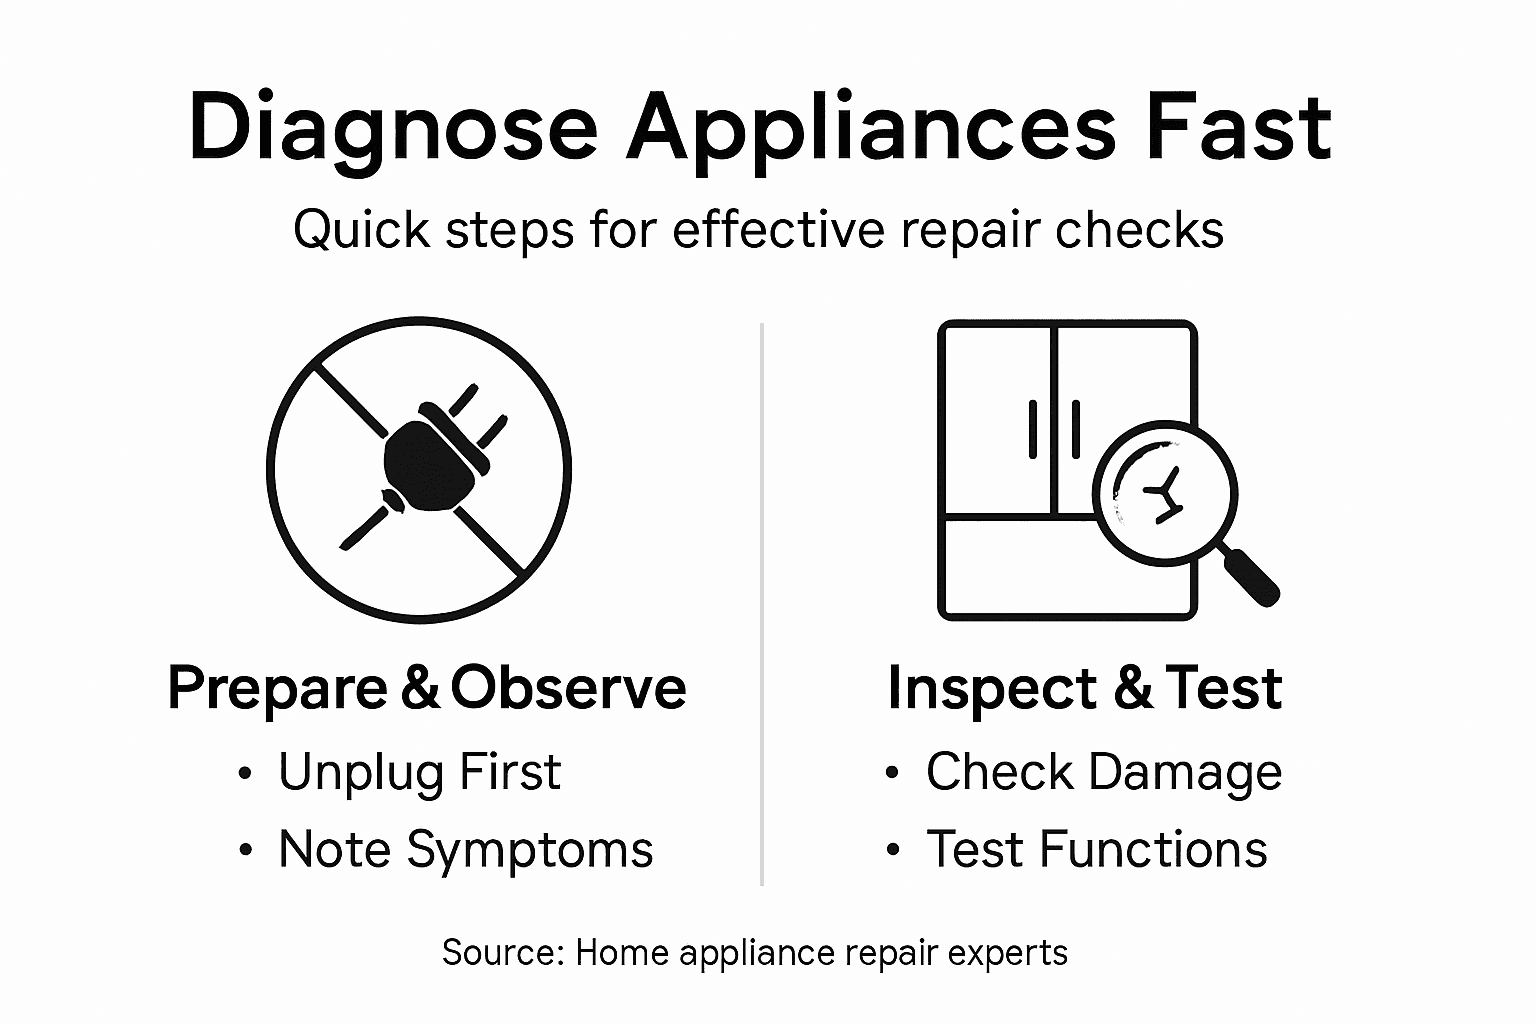
- Step 1: Prepare Tools And Ensure Safety
- Step 2: Identify Appliance Symptoms And Gather Details
- Step 3: Inspect Visible Parts For Damage
- Step 4: Test Core Functions And Electrical Connections
- Step 5: Verify Diagnosis And Decide Next Steps
Quick Summary
| Key Point | Explanation |
|---|---|
| 1. Use the Right Tools for Safety | Essential tools like multimeters and insulated screwdrivers help prevent hazards and ensure safe repairs. |
| 2. Document Symptoms Thoroughly | Observing and recording unusual behaviors aids in diagnosing the appliance’s specific issues effectively. |
| 3. Perform a Detailed Inspection | Conducting a visual inspection helps identify hidden damage before proceeding with repairs. |
| 4. Conduct Electrical Tests Carefully | Systematic testing can reveal potential problems not visible during inspections and promote safety. |
| 5. Evaluate Repair or Replacement | Assess repair costs against appliance value to make informed decisions about continuing repairs or replacement. |
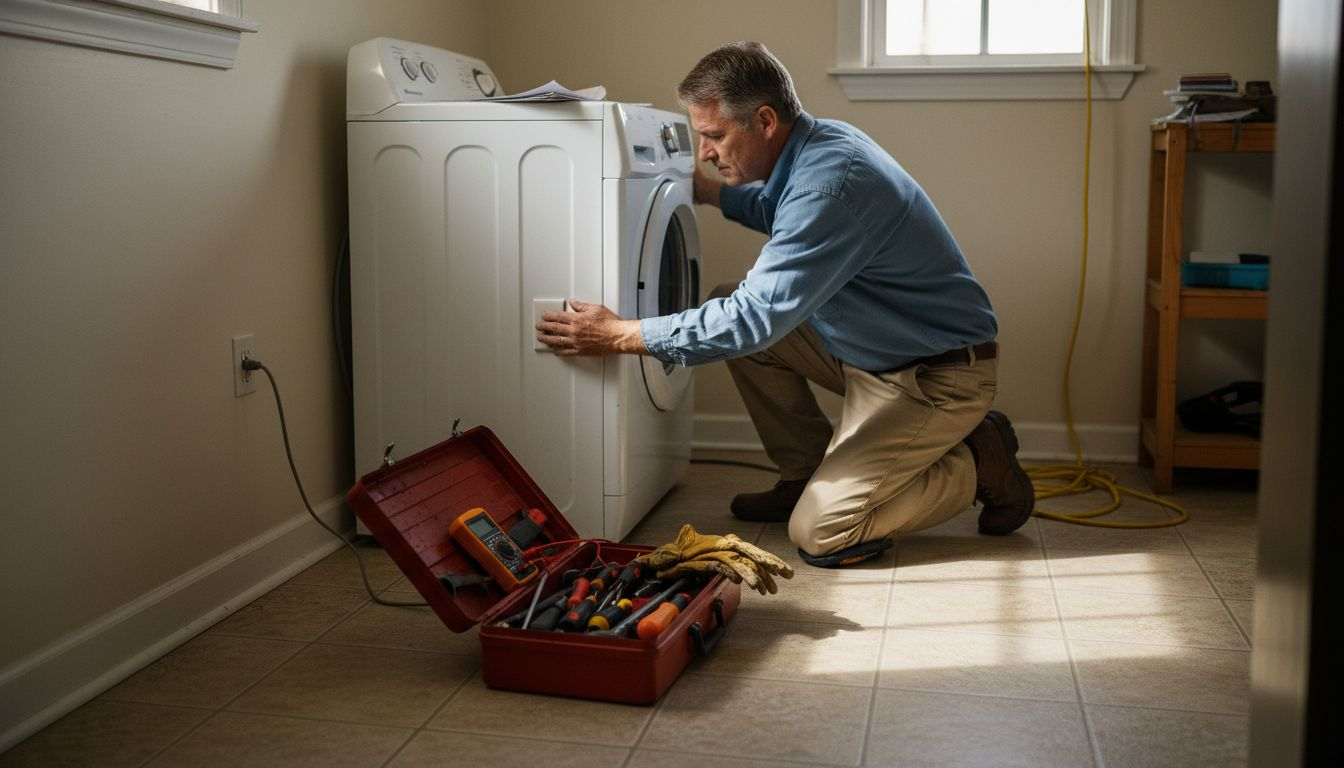
Step 1: Prepare Tools and Ensure Safety
Before attempting any appliance diagnosis, you need to set yourself up for a safe and successful repair experience. Gathering the right tools and taking necessary safety precautions will prevent potential injuries and ensure a smooth troubleshooting process.
First, collect the essential diagnostic equipment you’ll need. Your toolkit should include:
- Multimeter for electrical testing
- Insulated screwdrivers with rubber handles
- Protective work gloves
- Safety glasses
- Voltage tester
- Flashlight
Taking electrical safety seriously is crucial. Electrical safety foundations recommend carefully inspecting all tools and equipment before use. Check electrical cords for any signs of fraying or damage, and never use tools with compromised insulation.
Protecting yourself from potential electrical hazards is as important as fixing the appliance itself.
Before starting any repair, always disconnect the appliance from power. This means unplugging the device or switching off the appropriate circuit breaker. Double-check the power is completely off using your voltage tester.
Pro tip: Keep a fire extinguisher nearby and ensure your workspace is well-ventilated when working on electrical appliances.
Here’s a quick summary of safety essentials for appliance diagnosis:
| Safety Measure | Why It Matters | Example Best Practice |
|---|---|---|
| Tool inspection | Prevents electric shocks and injury | Check insulation before use |
| Power disconnection | Protects from accidental activation | Switch off breaker and verify |
| Personal protection | Reduces risk from sparks/debris | Use safety glasses and gloves |
| Fire readiness | Ensures preparedness for emergencies | Keep fire extinguisher nearby |
Step 2: Identify Appliance Symptoms and Gather Details
Now that your tools are ready, it’s time to diagnose your appliance’s specific problem by systematically gathering and documenting its symptoms. Careful observation and detailed documentation will help you or a technician understand exactly what’s going wrong.
Start by paying close attention to your appliance’s unusual behaviors. Identifying appliance symptoms can reveal critical information about potential issues. Look for these key indicators:
- Unusual noises like grinding, squealing, or banging
- Performance changes such as reduced efficiency
- Strange odors during operation
- Unexpected shutdowns or electrical interruptions
- Visible physical damage or wear
Documenting symptoms precisely can save time and prevent costly unnecessary repairs.
For each symptom, note specific details like:
- Exact time the problem occurs
- Frequency of the issue
- Conditions surrounding the malfunction
- Any recent changes in usage or environment
These observations will create a comprehensive picture of your appliance’s condition, helping diagnose the root cause more accurately.
Pro tip: Take clear photos or videos of the symptoms to provide visual evidence when consulting a repair professional.
Step 3: Inspect Visible Parts for Damage
With your symptoms documented, it’s time to conduct a thorough visual examination of your appliance. Visual inspection techniques are crucial for identifying potential issues that might not be immediately apparent.
Begin by carefully examining the appliance’s external and internal components. Look for these critical signs of damage:
- Burn marks or discoloration
- Frayed electrical wires
- Corrosion on metal components
- Cracks in plastic or ceramic parts
- Warped or melted sections
- Loose or broken connections
A meticulous visual inspection can reveal underlying problems before they become serious failures.
Use your flashlight and magnifying glass to inspect hard-to-see areas. Pay special attention to:
- Electrical connections and terminals
- Seals and gaskets
- Moving mechanical parts
- Areas showing signs of previous repairs
During your inspection, document any damage by taking clear, well-lit photographs. These can help you communicate the issue more effectively with a repair professional or diagnose the problem yourself.
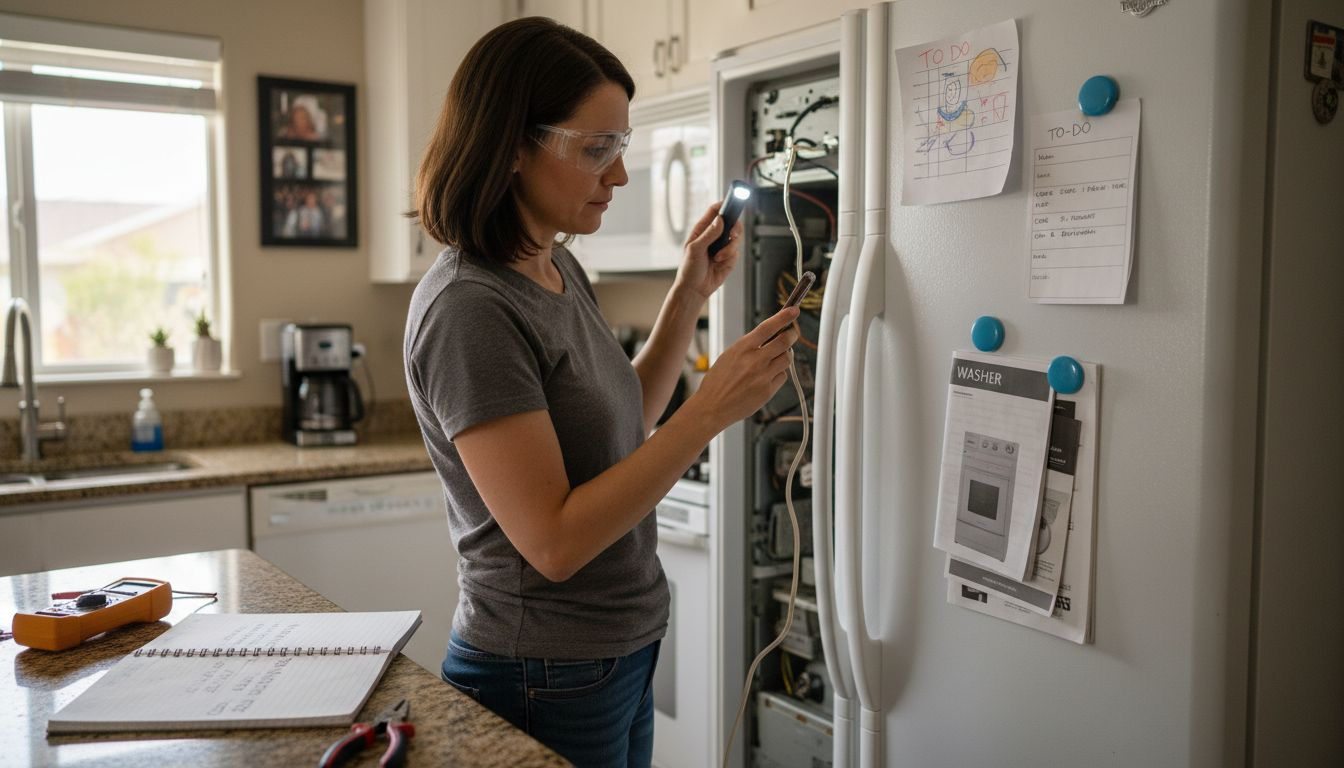
Pro tip: Always use proper lighting and wear safety glasses when conducting a detailed appliance inspection.
Step 4: Test Core Functions and Electrical Connections
After visually inspecting your appliance, it’s crucial to test its electrical systems and core functionality. Electrical testing techniques help diagnose potential issues that might not be visible during a standard inspection.
Use your multimeter to perform these essential electrical tests:
- Continuity testing for electrical pathways
- Voltage measurement at key connection points
- Resistance checks for electrical components
- Ground connection verification
- Short circuit detection
Systematic electrical testing can prevent potential safety hazards and identify underlying mechanical problems.
Proceed through these testing steps carefully:
- Set multimeter to appropriate testing mode
- Disconnect appliance from power source
- Test individual electrical components
- Check for consistent voltage levels
- Verify proper grounding connections
Remember to document your test results, noting any irregular readings or unexpected behaviors. These observations will be critical for potential repair or professional diagnosis.
Pro tip: Always discharge capacitors and use insulated tools when performing electrical tests to prevent potential electrical shock.
Step 5: Verify Diagnosis and Decide Next Steps
With your comprehensive diagnostic work complete, it’s time to assess the findings and determine the most cost-effective solution. Appliance repair decision strategies can help you make an informed choice about whether to repair or replace your appliance.
Consider these critical factors when evaluating your diagnosis:
- Repair cost compared to appliance’s current value
- Age of the appliance
- Frequency of previous repairs
- Availability of replacement parts
- Energy efficiency of current model
- Potential future maintenance expenses
The right decision balances immediate cost with long-term reliability and performance.
Your diagnostic process should lead you to one of three primary outcomes:
- Self-repair if the issue is minor and within your skill level
- Professional repair for complex electrical or mechanical problems
- Replacement when repair costs exceed the appliance’s value
Document all your diagnostic findings, including test results, visual observations, and potential repair estimates. This information will be crucial when consulting with a professional repair technician or making a replacement decision.
Pro tip: Always get at least two professional repair quotes before deciding to replace an appliance to ensure you’re making the most cost-effective choice.
Compare your decision options in appliance repair:
| Solution Type | Best For | Considerations |
|---|---|---|
| Self-Repair | Minor issues, skilled owners | Low cost, may void warranty |
| Professional Help | Complex faults, electrical risks | Higher cost, expert assessment |
| Replacement | Aging or costly appliances | Long-term savings, upfront cost |
Take Control of Your Appliance Problems with Expert Help Today
Diagnosing appliance issues can be overwhelming when faced with complex symptoms and the risk of electric hazards. This article highlights how careful observation, electrical testing, and safety precautions are essential but also shows how challenging it can be to identify the root cause quickly. If you want to avoid guesswork and save precious time while ensuring your appliances operate safely and efficiently, our team at Expert Appliance Repair is here to help.

Don’t let appliance troubles disrupt your daily routine any longer. Visit our Appliance Archives – Expert Appliance to learn more about common appliance issues or reach out directly at Expert Appliance Repair for fast, reliable service in Marlboro, NJ and Monmouth County. With our same-day service, 24/7 emergency support, and upfront pricing, you get professional repairs backed by decades of experience. Take the next step toward hassle-free home repairs by scheduling your expert diagnosis and repair now.
Frequently Asked Questions
How do I start diagnosing my appliance for quick repairs?
Begin by preparing your tools and ensuring safety. Gather essential items like a multimeter, insulated screwdrivers, and safety gear, and make sure to disconnect the appliance from power before you start.
What symptoms should I look for when diagnosing an appliance?
Pay attention to unusual noises, performance changes, strange odors, unexpected shutdowns, and visible physical damage. Document these symptoms clearly to help identify the root cause of the issue.
How can I perform a visual inspection of my appliance?
Conduct a thorough visual examination of both external and internal components. Look for signs of damage like burn marks, frayed wires, and loose connections, and take photos to document any findings.
What electrical tests can I perform during appliance diagnosis?
You can test using a multimeter for continuity, voltage, and resistance to check the electrical systems. Perform these tests carefully and document your results to help determine if there are underlying issues needing repair.
How do I decide whether to repair or replace my appliance?
Evaluate the repair cost against the appliance’s current value, its age, and the availability of parts. If the repair cost is high compared to the value, consider replacing the appliance for long-term savings.
What should I do if I can’t determine the problem after my diagnosis?
If you can’t pinpoint the issue, consider consulting a professional repair technician. Gather all your documented symptoms and test results to help the technician understand the problem quickly.
Recommended
- 7 Essential Emergency Appliance Repair Tips for Homeowners – Expert Appliance
- What Is Smart Appliance Repair and Why It Matters – Expert Appliance
- Diagnostic Appliance Service: Fast Solutions for NJ Homes – Expert Appliance
- How to Repair Refrigerator: Step-by-Step Guide for Fast Results – Expert Appliance