
Every Marlboro homeowner knows the headache of an unexpected appliance failure disrupting daily life and draining wallets. Routine maintenance not only protects your investment but also keeps your family safer by reducing risks like electrical shock and fire hazards. With the right tools, careful cleaning, and proactive inspections, you can extend the lifespan of your appliances and enjoy greater peace of mind. Bold steps like consistent component cleaning and safety preparation are your best defense against costly repairs.
Table of Contents
- Step 1: Gather Necessary Tools and Prepare Safely
- Step 2: Clean Key Components of Major Appliances
- Step 3: Inspect for Wear, Damage, and Loose Connections
- Step 4: Test Functionality and Check Appliance Performance
Quick Summary
| Key Point | Explanation |
|---|---|
| 1. Use Proper Tools for Safety | Gather appropriate tools like screwdrivers and pliers to prevent personal injuries and appliance damage during maintenance. |
| 2. Perform Regular Cleanings | Clean key appliance components like dryer vents and refrigerator coils to improve efficiency and extend lifespan. |
| 3. Inspect Appliances for Issues | Regularly check for wear and loose connections to identify potential hazards and avoid costly repairs. |
| 4. Test Appliance Functionality | Run basic performance checks for each appliance to ensure they are operating safely and efficiently after maintenance. |
| 5. Document Maintenance Activities | Keep a log of inspections and cleanings to track performance patterns and schedule necessary maintenance timely. |
Step 1: Gather Necessary Tools and Prepare Safely
Before you touch any appliance, you need the right tools and a safe setup. This step prevents injuries, protects your devices from damage, and sets you up for success with whatever maintenance task lies ahead.
Start by collecting the tools you’ll actually use. Most basic appliance maintenance doesn’t require anything fancy or expensive. Here’s what typically belongs in your DIY appliance toolkit:
- Screwdrivers (Phillips and flathead in various sizes)
- An adjustable wrench or socket set
- A multimeter for electrical safety checks
- Pliers and a hex key set
- A flashlight or headlamp
- Cleaning supplies like brushes and cloths
- Masking tape for labeling
The most important part? Using the right tools for each job prevents both personal injury and accidental appliance damage. Don’t force a flathead screwdriver where a Phillips belongs, and never use pliers as a hammer.
Inspect every tool before using it. Check for bent handles, cracked grips, or damaged tips. A broken tool isn’t just useless—it’s dangerous. If something looks worn out, replace it rather than risk injury.
Safety preparation is not an afterthought; it’s the foundation of every successful maintenance project.
Now prepare your workspace. Clear the area around your appliance so you have room to work comfortably and won’t trip over clutter. If you’re working on something in the kitchen, keep portable appliances away from sinks to eliminate shock risks. Move cords out of walkways to prevent tripping hazards, and ensure you have good lighting.
Put on appropriate personal protective equipment before starting. Safety glasses protect your eyes from dust and debris. Work gloves prevent cuts and provide better grip. If you’re working near electrical components, wear insulated gloves designed for the task.
Disconnect the appliance from power. Always. Even if you’re just doing a quick inspection, unplug it or switch off the circuit breaker. This single action prevents serious electrical injuries and is non-negotiable for any maintenance work.
Here’s how common safety risks are addressed during appliance maintenance:
| Safety Risk | Preventive Action | Resulting Benefit |
|---|---|---|
| Electrical shock | Unplug appliance before inspection | Reduces risk of injury |
| Sharp debris exposure | Wear safety glasses and gloves | Minimizes cuts and eye injuries |
| Tripping hazards | Clear workspace and move cords | Ensures safe, uncluttered area |
| Tool malfunction | Inspect tools for wear or damage | Prevents accidents while working |
Pro tip: Create a simple checklist of your tools and safety steps before each project, and take a photo of how everything looks before you start disassembling anything—you’ll thank yourself when reassembly time comes.
Step 2: Clean Key Components of Major Appliances
Cleaning the hidden parts of your appliances is where real maintenance happens. When you focus on key components, you prevent breakdowns, improve efficiency, and keep your Marlboro home safer.
Start with your refrigerator. The condenser coils collect dust and debris over time, forcing your fridge to work harder and use more energy. Pull out the refrigerator and locate the coils on the back or underneath. Use a coil brush or vacuum with a brush attachment to gently remove buildup. Don’t forget the water filter, which should be replaced every six months to maintain water quality and ice maker performance.
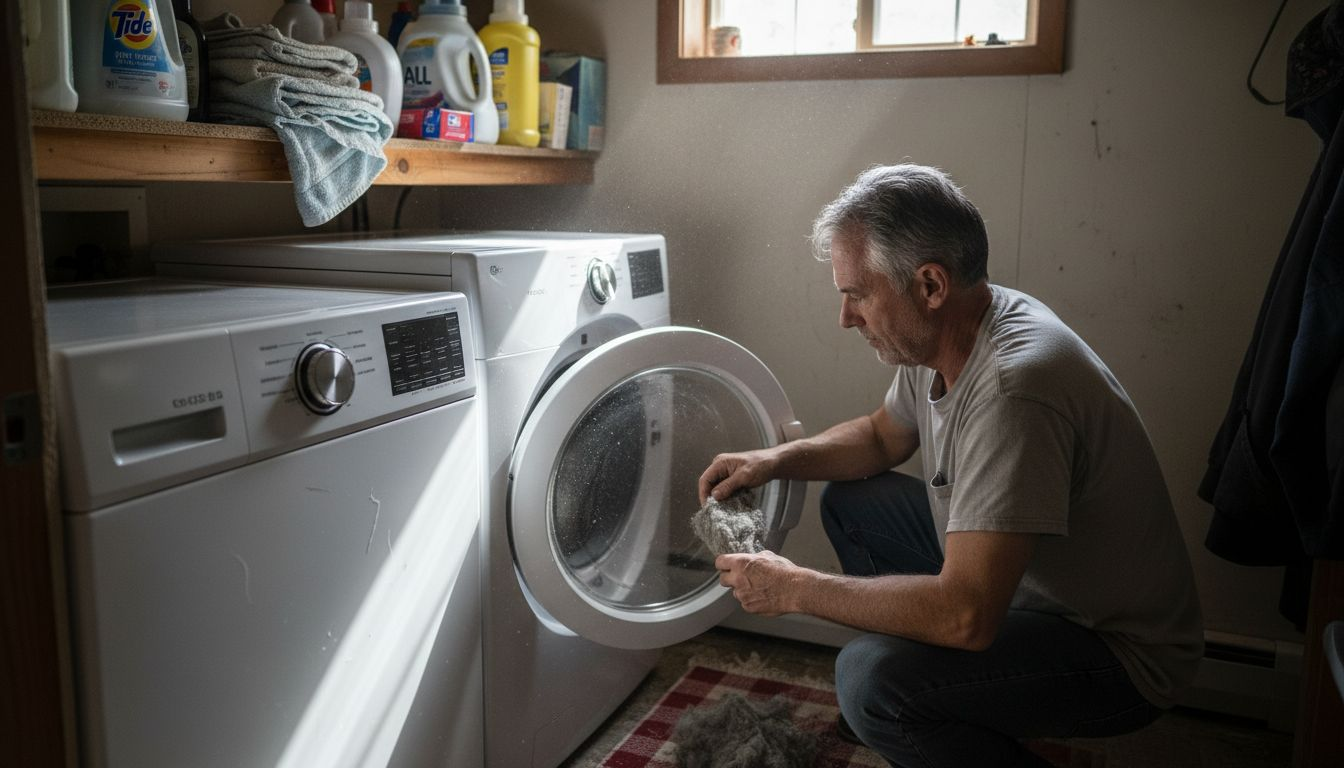
Your dryer deserves serious attention. The lint trap needs cleaning after every single load, but that’s only the start. Over time, lint builds up inside the ductwork and vent, creating a serious fire hazard. Remove the front panel if possible and vacuum out accumulated lint from the drum area. Check your exhaust vent from outside to make sure it’s not clogged. A restricted dryer vent forces your machine to overheat and work inefficiently.
For your oven and range, grease buildup isn’t just gross—it’s dangerous. Removing grease accumulation from your oven reduces fire risk and helps heat distribute evenly. Wipe down interior surfaces, clean the racks, and don’t skip the stovetop. Regular cleaning prevents ignition hazards.
Your dishwasher’s spray arms and filter trap food particles that reduce cleaning power. Remove the lower rack and unscrew the filter basket at the bottom. Rinse it thoroughly and check the spray arm holes, clearing any blockages with a toothpick. This workflow takes just minutes but dramatically improves performance.
Here’s what to prioritize in your cleaning schedule:
- Dryer lint trap after every load
- Refrigerator condenser coils quarterly
- Dishwasher filter and spray arms monthly
- Oven and range surfaces weekly
- Washing machine drain pump filter (if accessible) every few months
Regular component cleaning prevents 80 percent of common appliance failures before they start.
When cleaning, use appropriate tools for each job. Never use harsh chemicals on sensitive parts, and always check your appliance manual for specific guidance. Maintaining a clean kitchen environment reduces bacteria and allergens while extending appliance life.
Pro tip: Mark your calendar with cleaning dates for each appliance component, and keep a simple logbook noting what you cleaned and when—this helps you spot patterns and prevents neglecting critical maintenance tasks.
Step 3: Inspect for Wear, Damage, and Loose Connections
Regular inspection catches problems before they become expensive repairs. By spending 15 minutes examining your appliances, you’ll spot worn parts, loose wiring, and potential safety hazards that could otherwise damage your Marlboro home.
Start by visually examining the exterior and accessible interior of each appliance. Look for cracks in plastic housing, discoloration around seams, or rust spots on metal surfaces. These signs indicate moisture exposure or age-related deterioration. Check all visible wiring and connections to ensure they’re secure and not frayed or damaged.
Move your attention to components that experience the most stress. Hoses on washing machines and dishwashers crack and develop weak spots over time. Squeeze them gently and look for bulges, soft spots, or visible cracks. Common appliance problems like water leakage often stem from deteriorating hoses that fail without warning.
Inspect electrical cords carefully. A damaged cord is a serious safety hazard. Look for cuts, burns, or melting in the insulation. Check where the cord enters the appliance—this stress point frequently shows wear first. If you spot any damage, stop using that appliance immediately and get it serviced.
Look at seals and gaskets. Refrigerator door seals and dishwasher gaskets deteriorate from constant use and temperature cycling. Press on the seal to check for firmness and flexibility. A failing gasket wastes energy and allows leaks. Washing machine door seals collect moisture and mildew, so inspect for cracks or separation.
Pay special attention to these high-wear areas:
- Power cord and plug connection points
- Hose connections and clamps
- Door seals and hinges
- Fan blades and motors
- Water inlet connections
- Visible fasteners and bolts
Listen during operation too. Strange noises like grinding, squealing, or rattling signal internal wear. These sounds often indicate loose components or failing bearings that electrical safety inspections would catch in commercial settings.
Early detection of wear prevents catastrophic failure and keeps your family safe.
When inspecting, take photos of any concerns. Document the date and what you observed. This record helps you track whether issues are worsening and provides valuable information if you need professional service.
Pro tip: Create a simple inspection sheet for each major appliance, listing components to check and when you last inspected them—consistency catches subtle changes that single inspections might miss.
Step 4: Test Functionality and Check Appliance Performance
Testing how your appliances actually work reveals hidden problems that inspections alone won’t catch. By running through basic performance checks, you’ll confirm everything operates safely and efficiently before minor issues become major breakdowns.
Start with your refrigerator. Set it to run for a few minutes and listen for the compressor engaging. Feel the back of the fridge to confirm it’s getting warm as heat dissipates from the cooling cycle. Check that the freezer reaches proper temperature by placing a thermometer inside for 30 minutes. It should read 0 degrees Fahrenheit or colder.
For your washing machine, run it through a full cycle without clothes. Listen for unusual noises during the wash, rinse, and spin phases. Check that water fills, drains, and spins properly. Watch for vibration that’s excessive or unbalanced. These observations indicate bearing wear or other mechanical problems early.
Test your dryer with a short cycle. It should heat properly and tumble smoothly. Functional testing simulates real-world operating conditions to verify your appliances work within their design specifications. Feel the vent outlet after running—warm air should flow freely, not weakly.
Run your dishwasher on a normal cycle. Check that spray arms rotate freely, water heats properly, and the drain empties completely. Open it midway to verify spray arm movement. These simple checks catch clogs and mechanical failures before they worsen.
For ovens and ranges, test each burner independently. Gas burners should ignite quickly with even flames. Electric coils should glow red evenly. Check oven temperature accuracy by preheating to 350 degrees and using an oven thermometer. A significant difference signals a faulty thermostat.
Key performance indicators to check across all appliances:
- Normal startup and shutdown cycles
- Expected temperature ranges
- Smooth operation without grinding or squealing
- Proper water drainage and heating
- Even performance across all functions
- No burning smells or visible smoke
Appliance safety requires verification that devices meet electrical codes and operate safely in your home.
Document your findings. Note any irregularities like slow heating, weak water pressure, or strange sounds. Compare results to your appliance manuals for expected performance. If anything falls outside normal range, that’s your signal to address it now before it fails.
The following table summarizes signs of appliance trouble, likely causes, and recommended actions:
| Symptom | Potential Cause | Recommended Response |
|---|---|---|
| Unusual noises | Worn bearings or loose parts | Inspect and tighten components |
| Slow heating | Dirty coils or faulty part | Clean thoroughly, replace if bad |
| Water leaks | Cracked hose or gasket | Replace damaged hose/gasket |
| Poor drying (dryer) | Blocked vent or lint buildup | Clean vents and lint trap |
Pro tip: Keep a simple test log noting date, appliance, and performance observations—patterns emerge over time, helping you predict maintenance needs weeks before failure occurs.
Protect Your Investment with Expert Appliance Support in Marlboro, NJ
DIY appliance maintenance is a great way to extend the life and performance of your major household devices. However, despite your best efforts cleaning, inspecting, and testing your refrigerator, dryer, or dishwasher, unexpected issues can still arise. Problems like worn wiring, cracked hoses, or inefficient components need timely professional care to avoid costly repairs and safety risks around your Marlboro home.

When you want to move beyond basic upkeep and ensure flawless appliance operation, rely on the trusted experts at Expert Appliance Repair. Since 1988, our family-owned New Jersey business has delivered fast, same-day service and 24/7 emergency repairs throughout Monmouth County. Explore our Appliance Archives for tips plus guaranteed professional solutions tailored for washers, ovens, vacuum cleaners, and more. Don’t risk appliance failure or safety hazards—contact us today through Expert Appliance Repair to schedule service and keep your home running smoothly.
Frequently Asked Questions
What tools do I need for DIY appliance maintenance?
Before starting any appliance maintenance, gather essential tools such as screwdrivers, an adjustable wrench, a multimeter, and cleaning supplies. Having these tools ready helps ensure a safe and effective maintenance process, reducing the likelihood of accidents or damage.
How often should I clean my refrigerator’s condenser coils?
Clean your refrigerator’s condenser coils at least once every three months. Regular cleaning prevents dust buildup, helps your fridge run more efficiently, and can even lower your energy bills by approximately 10%.
What should I look for when inspecting my appliances for wear?
During inspections, check for visible signs like cracks in housing, frayed wires, or moisture damage. Pay special attention to high-stress parts like hoses and seals, as early detection of these issues can prevent costly failures.
How can I improve my appliance’s performance through testing?
Test your appliances regularly to confirm they operate within their intended specifications. For example, check if your refrigerator maintains a temperature of 0 degrees Fahrenheit by placing a thermometer inside for 30 minutes; addressing any deviations now can prevent larger issues later.
When should I replace appliance parts instead of repairing them?
Replace parts when you notice significant wear or damage, such as cracks or frayed wiring, that cannot be fixed easily. Acting on these issues promptly prevents further damage and ensures your appliances continue working safely and effectively.
Is it necessary to disconnect my appliance from power before maintenance?
Yes, always disconnect your appliance from the power source before performing any maintenance tasks. This step minimizes the risk of electrical shock and ensures a safer working environment.
Recommended
- What Is Appliance Maintenance? Complete Guide for NJ Homes – Expert Appliance
- 7 Key Benefits of Regular Appliance Service for Homeowners – Expert Appliance
- 7 Essential Appliance Maintenance Schedule Tips for Homeowners – Expert Appliance
- Complete Appliance Maintenance Checklist for Homeowners – Expert Appliance
- Spring Cleaning for Tabletop Gamers: Refresh Your Game Space! – 1985 Games
- Top 3 Tools Every Garage Should Be Using in 2025