Most American households face at least one unexpected appliance breakdown each year, and the right approach can save you time, stress, and costly repair bills. Simple steps using basic tools and smart safety habits turn even the most daunting repair tasks into manageable solutions. With practical guidance and essential facts—like how a well-stocked toolkit can prevent up to 40 percent of appliance injuries—you will be well-equipped to handle your next home repair.
Table of Contents
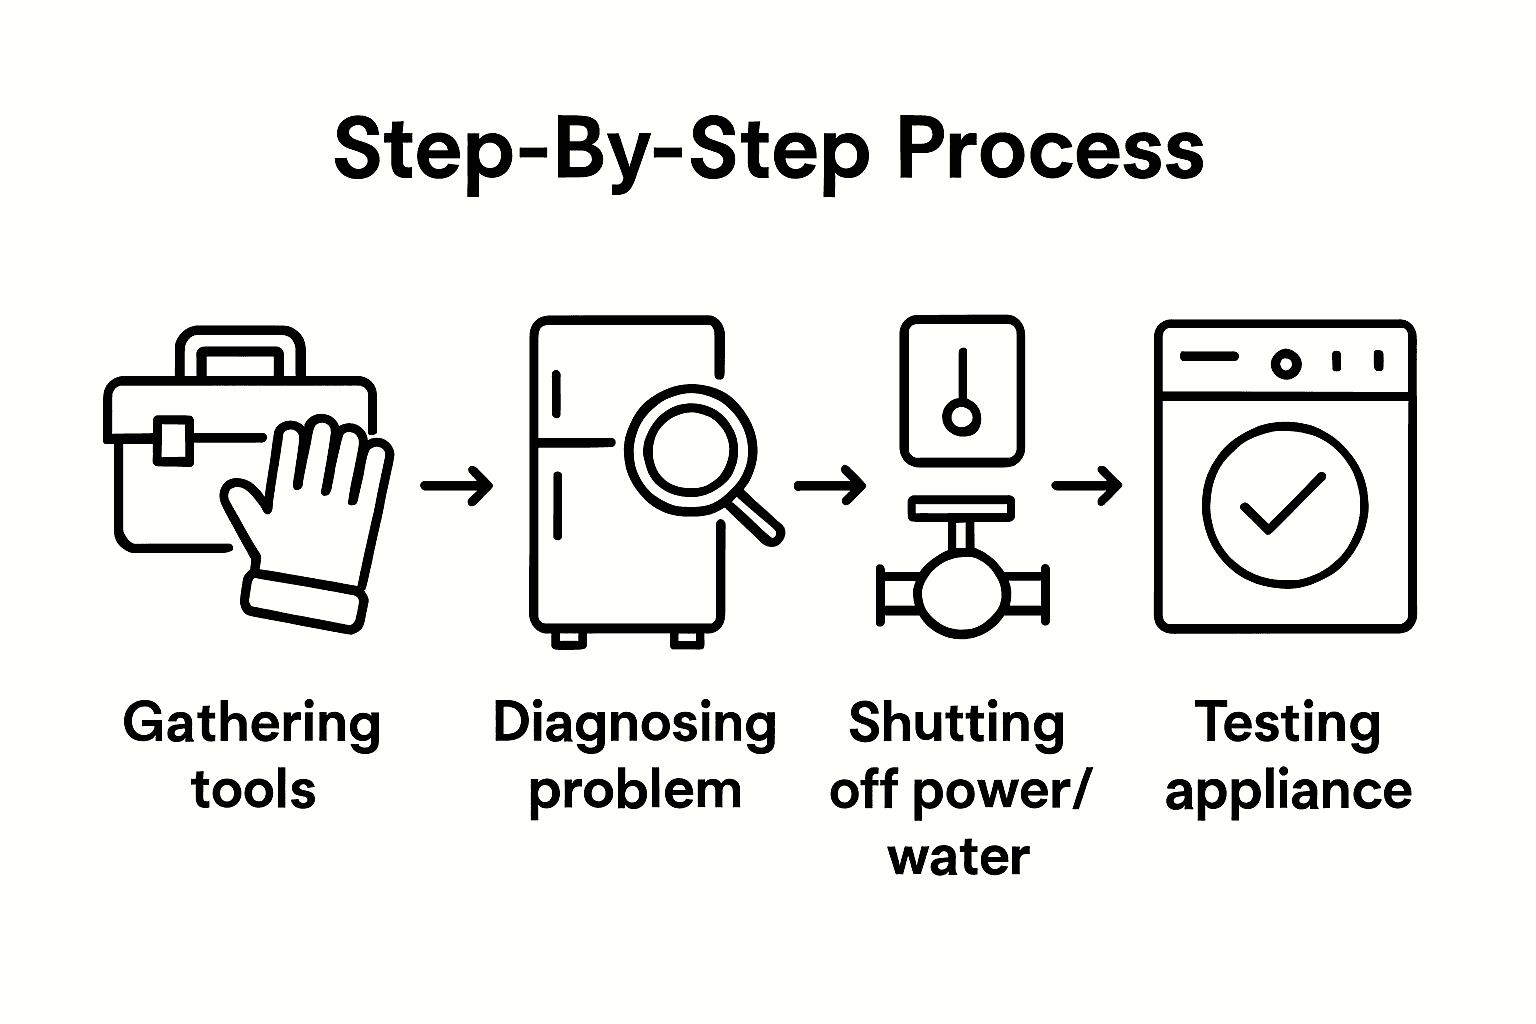
- Step 1: Gather Essential Tools And Safety Gear
- Step 2: Identify The Appliance Problem Quickly
- Step 3: Shut Off Power Or Water Before Inspecting
- Step 4: Diagnose And Apply Simple Repair Solutions
- Step 5: Test Appliance Operation For Success
Quick Summary
| Key Insight | Explanation |
|---|---|
| 1. Gather essential tools first | Prepare a core toolkit and safety gear for efficient and safe appliance repairs. |
| 2. Identify appliance problems quickly | Observe unusual signs and use manuals for diagnostics to save time and frustration. |
| 3. Disconnect power and water supplies | Always shut off electricity or water to ensure safety before inspecting appliances. |
| 4. Apply simple repair solutions | Conduct basic repairs by checking connections and cleaning relevant parts of the appliance. |
| 5. Test appliance operation thoroughly | After repairs, monitor performance closely to ensure the issue has been resolved successfully. |
Step 1: Gather Essential Tools and Safety Gear
Before diving into any appliance repair project, you need the right tools and safety equipment to protect yourself and work efficiently. Gathering the appropriate gear means you will be prepared for most household repair challenges.
Start by assembling your core toolkit which should include versatile hand tools like a combination wrench set, adjustable wrench, slip joint pliers, wire cutters, and a comprehensive screwdriver set. Safety equipment is equally critical. Invest in protective eyewear, a respirator mask for dust protection, and sturdy work gloves to shield your hands from potential cuts or sharp edges. A good flashlight will help you see into tight spaces around appliances, while a tape measure ensures precise measurements during repairs.
Organize your tools in a sturdy toolbox or rolling cart so everything is easily accessible when you need it. Keep your safety gear like glasses and mask in a clean, dedicated spot where they are immediately available. Having everything prepared beforehand prevents frustrating interruptions and helps you work more professionally and safely.
Pro tip: Inspect your tools regularly for wear and damage. Replace any items with cracked handles, loose heads, or signs of significant rust to maintain your repair kit’s reliability and your personal safety.
Here is a quick reference for essential appliance repair tools and their main uses:
| Tool or Safety Gear | Primary Use | Safety Impact |
|---|---|---|
| Combination wrench set | Tightening or loosening nuts and bolts | Reduces hand injury |
| Slip joint pliers | Gripping and twisting wires or parts | Improves grip control |
| Protective eyewear | Shields eyes from dust and debris | Prevents eye trauma |
| Respirator mask | Blocks fine particles during repairs | Protects breathing |
| Work gloves | Protects hands from sharp edges | Lowers cut risk |
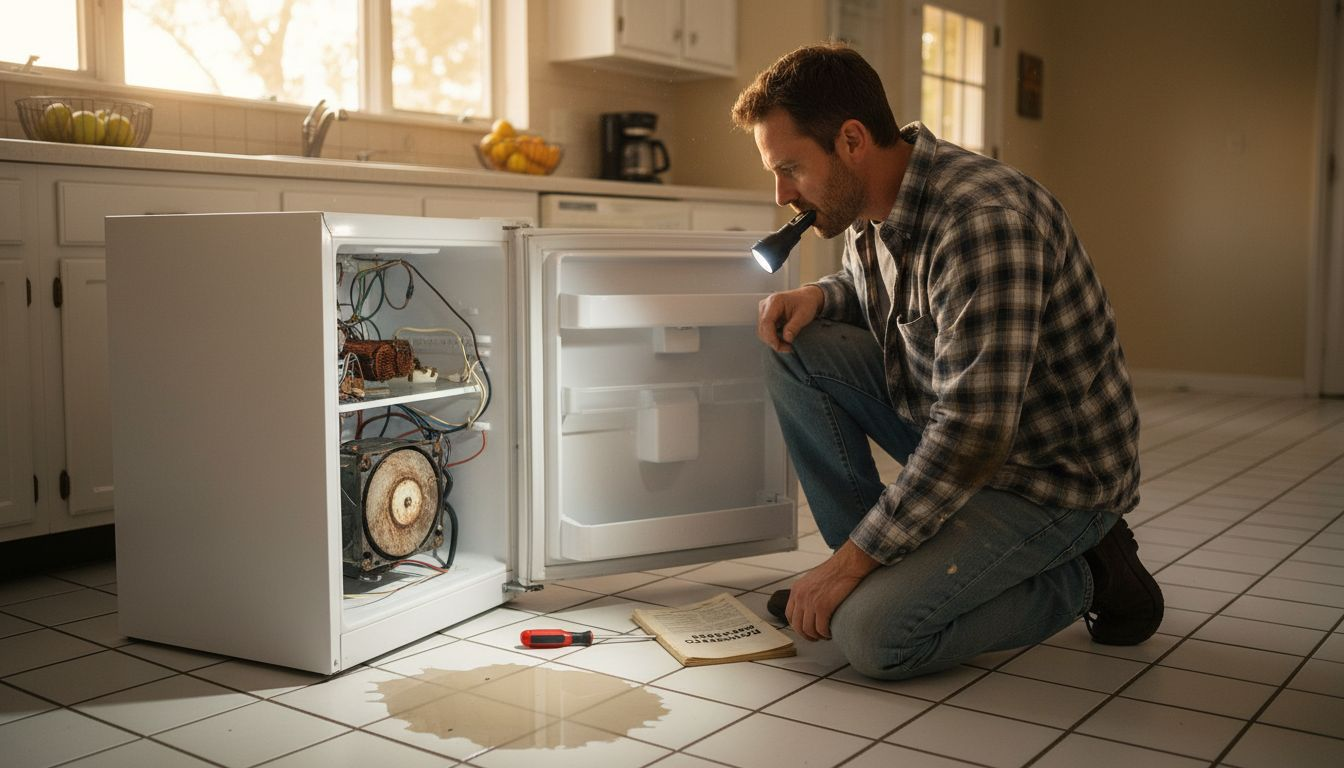
Step 2: Identify the Appliance Problem Quickly
Quickly pinpointing the specific issue with your malfunctioning appliance can save you time, money, and potential frustration. Understanding how modern technology enables precise appliance diagnostics helps homeowners become more proactive about equipment maintenance.
Start by carefully observing your appliance and noting any unusual sounds, performance changes, or visible signs of wear. Most modern appliances are now equipped with embedded sensors that can communicate specific error codes or status messages. Check your appliance manual or look for a digital display that might reveal diagnostic information about potential mechanical or electrical problems. Pay attention to subtle indicators like strange noises, unexpected shutdowns, inconsistent performance, or unusual temperature fluctuations.
If your appliance has a digital interface, consult its manual or manufacturer website to decode any error messages. Some smart home technologies can even help you understand potential issues through real-time monitoring and predictive analytics. Take detailed notes about when and how the problem occurs, which will be invaluable information when discussing repairs with a professional technician.
Pro tip: Always unplug the appliance before attempting any close inspection to ensure your personal safety during the diagnostic process.
This summary highlights common signs of appliance failure and their possible causes:
| Symptom | Possible Cause | Recommended First Step |
|---|---|---|
| Unusual noises | Loose parts or worn bearings | Inspect moving components |
| Inconsistent operation | Faulty sensor or thermostat | Check for error codes |
| Unexpected shutdowns | Electrical connection issues | Verify power supply |
| Odd temperature swings | Malfunctioning heating/cooling | Inspect thermostat setting |
Step 3: Shut Off Power or Water Before Inspecting
Before diving into any appliance repair, your first priority is ensuring personal safety by disconnecting electrical and water sources. Electrical safety guidelines emphasize the critical importance of unplugging malfunctioning equipment to prevent potential shocks or fire hazards.
For electrical appliances, locate your home circuit breaker panel and switch off the specific circuit powering the device you are inspecting. This means completely cutting power to prevent any unexpected electrical current. For water-connected appliances like dishwashers or washing machines, find the nearby shutoff valve and turn it clockwise until fully closed. These valves are typically located behind the appliance or under your kitchen and laundry room sinks. Always use caution and wear protective gloves when manipulating electrical connections or water valves.
Remember that different appliances require different safety approaches. Large appliances might have dedicated circuit breakers, while smaller devices can be unplugged directly from the wall outlet. If you are uncertain about any electrical or water connection, pause and consult your appliance manual or contact a professional technician who can guide you through the proper disconnection process safely.
Pro tip: Always use a non-contact voltage tester to confirm that an electrical circuit is completely dead before beginning any repair work to eliminate any potential electrical risks.
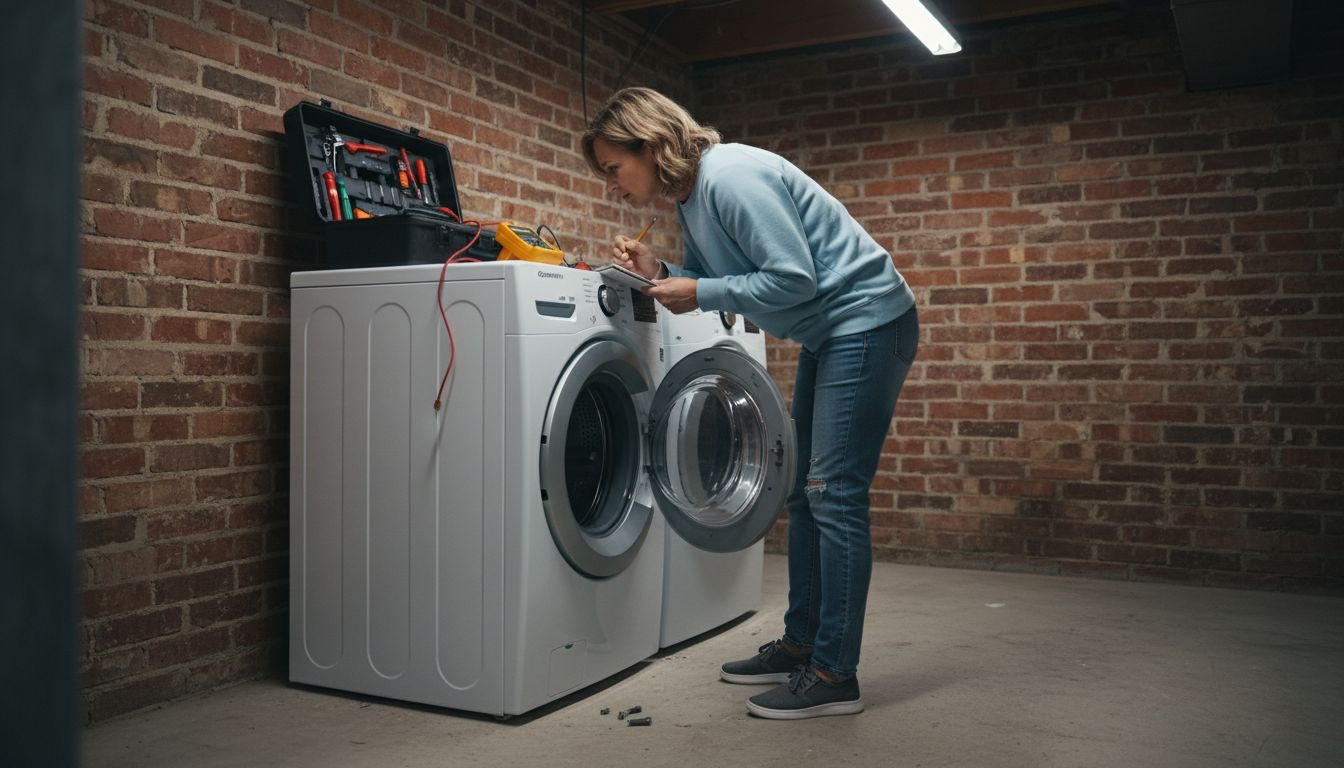
Step 4: Diagnose and Apply Simple Repair Solutions
Once you have safely disconnected power and identified the initial problem, you can begin addressing basic appliance issues with confidence. Exploring practical microwave repair techniques can help you resolve many common household appliance problems without calling a professional.
Start by carefully examining the appliance for obvious signs of wear or damage. For electrical components, use a continuity tester to check for broken connections or faulty wiring. Common simple repairs might include cleaning contact points, tightening loose screws, replacing worn gaskets, or clearing blocked filters. Pay special attention to areas that experience frequent stress such as door seals, electrical connections, and moving mechanical parts. Some straightforward fixes can restore an appliance’s functionality without requiring extensive technical knowledge or expensive replacement parts.
If your initial diagnostic and repair attempts do not resolve the issue, document everything you have checked and observed. Take clear photographs of the problem areas and note any error codes or unusual behaviors. This information will be incredibly valuable if you ultimately need to consult a professional technician, as it provides a comprehensive overview of the steps you have already taken.
Pro tip: Always keep your appliance manual in an easily accessible location and photograph any complex disassembly steps to ensure you can reassemble the device correctly.
Step 5: Test Appliance Operation for Success
After completing your repair work, the crucial final step is thoroughly testing your appliance to confirm that your efforts have successfully resolved the original problem. Electrical safety experts recommend carefully monitoring appliance performance during initial post-repair operation to ensure complete functionality and prevent potential hazards.
Reconnect power or water sources slowly and systematically. Start by running the appliance through a complete cycle while remaining present and observant. Watch for any unusual sounds, unexpected shutdowns, temperature irregularities, or signs of electrical stress like flickering lights or tripped circuit breakers. Pay close attention to the specific symptoms that initially prompted your repair attempt and verify they have been completely eliminated. If possible, test multiple operational modes to comprehensively validate your repair work.
Should you notice any persistent issues or unexpected behaviors during testing, do not continue operating the appliance. Immediately disconnect power and reassess your repair approach. Consider consulting a professional technician if you are uncertain about the appliance’s performance or if complex electrical components were involved in your repair process.
Pro tip: Keep a written log of the repair steps you performed and the specific test results to help track your appliance’s maintenance history and provide valuable information if professional intervention becomes necessary.
Fast and Reliable Appliance Repair Solutions in Marlboro NJ
Struggling with unexpected appliance breakdowns can disrupt your daily routine, especially when time is of the essence. This article on same day appliance repair tips highlights common challenges like quickly diagnosing problems safely and applying simple fixes before testing to restore function. If you want to save frustration and avoid prolonged downtime, Expert Appliance Repair is your dependable local partner in Marlboro and Monmouth County. Our team understands the urgency of appliance issues and offers prompt, professional service to get your refrigerator, washer, dryer, oven, or vacuum running smoothly again.

Experience peace of mind with our 24/7 emergency support and upfront pricing designed for fast homeowners and small businesses in New Jersey. Don’t let appliance troubles slow you down. Visit Expert Appliance Repair today to schedule same day service. Learn more about how we handle a variety of household repairs at our Appliance Archives – Expert Appliance and for vacuum-specific needs, browse our Vacuums Archives – Expert Appliance section. Take action now to protect your home’s comfort and efficiency with trusted local experts.
Frequently Asked Questions
What tools do I need for same day appliance repairs?
You need a core toolkit that includes hand tools like wrenches, pliers, and screwdrivers, along with safety gear such as protective eyewear, gloves, and a respirator mask. Gather these essential tools to efficiently tackle common appliance issues in a single day.
How can I quickly identify the problem with my appliance?
Observe your appliance for unusual sounds or performance changes, and check for error codes if it has a digital display. Take notes on what you observe, which will help you understand the issue quickly and facilitate potential repairs.
What safety precautions should I take before starting repairs?
Always disconnect your appliance from its power source and shut off any water connections before inspecting it. This step ensures your safety and prevents electrical shocks or water hazards while you work on the appliance.
How do I test if my repair work is successful?
After completing your repairs, reconnect the appliance to power or water and run it through a full cycle. Monitor its performance for any odd noises or shutdowns to ensure that your repair was effective.
What should I do if my quick repairs don’t solve the problem?
If the appliance still does not function correctly after your attempts, document your findings and consider consulting a professional technician. Providing them with your notes and observations can help diagnose the issue more efficiently.