Most American households rely on their kitchen stove every day, yet over 40 percent of appliance failures happen due to skipped maintenance. When your stove breaks down, a simple repair can save you both money and time compared to waiting for a technician. Knowing how to prepare, troubleshoot, and repair your stove empowers you to get back to making meals with confidence while keeping your home safe and running smoothly.
Table of Contents
- Step 1: Prepare the Stove and Gather Essential Tools
- Step 2: Diagnose Common Stove Issues Safely
- Step 3: Replace Faulty Components or Clean Parts
- Step 4: Reassemble and Test Stove Functionality
Quick Summary
| Key Insight | Explanation |
|---|---|
| 1. Gather Essential Tools First | Prepare an adequate toolkit including wrenches, screwdrivers, and safety gear before starting repairs. |
| 2. Diagnose Issues Systematically | Conduct visual inspections and functional tests to identify problems safely without risking further damage. |
| 3. Replace or Clean Affected Parts | Carefully inspect, clean, and replace faulty components to restore the stove’s performance effectively. |
| 4. Reassemble with Precision | Reassemble the stove using reference photos to ensure components are correctly installed before testing. |
| 5. Test Thoroughly After Repairs | After reassembly, test each burner or element to ensure functionality and safety through varied operations. |
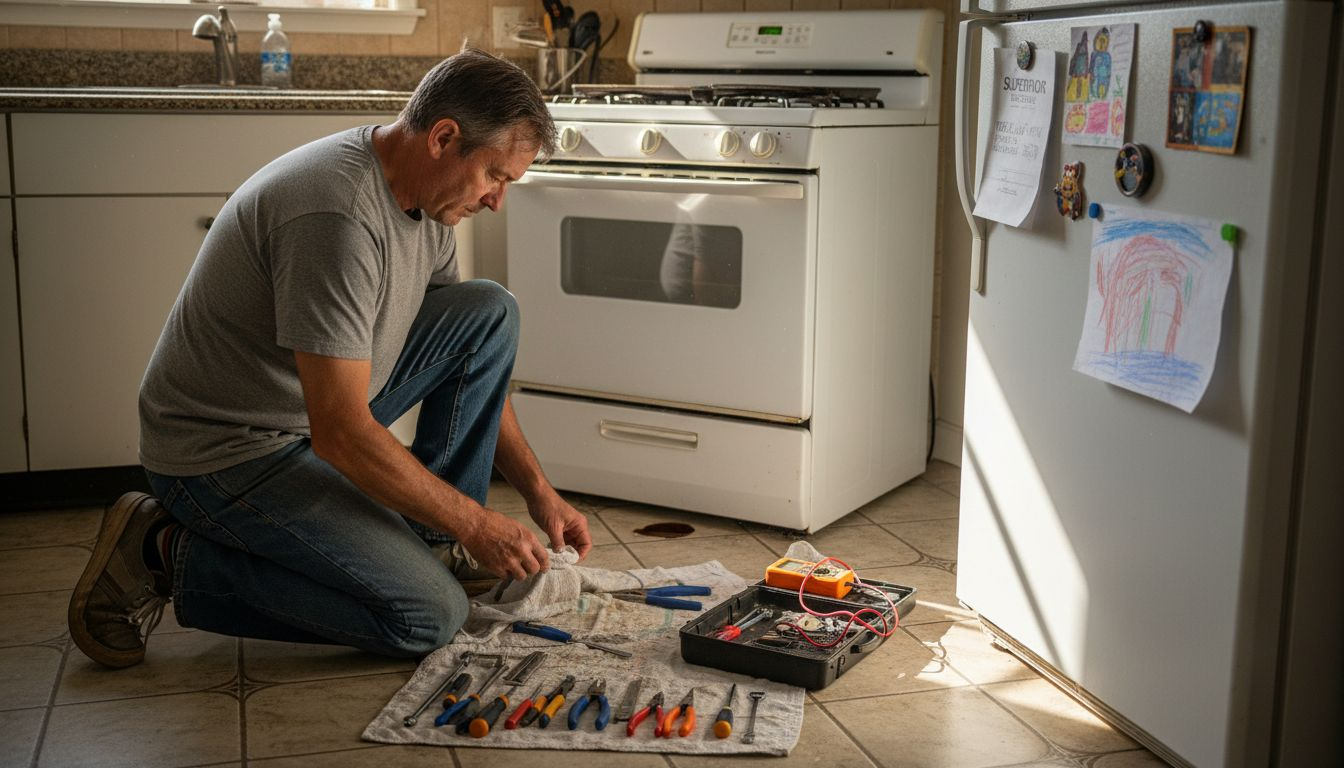
Step 1: Prepare the Stove and Gather Essential Tools
Before diving into stove repairs, you need the right tools and workspace preparation. This initial step ensures you can work safely and efficiently on your appliance repair project.
First, gather your essential toolkit. According to kitchen equipment guidelines, you will want a comprehensive set of repair tools including adjustable wrenches, screwdrivers (both flathead and Phillips), pliers, work gloves, and safety glasses. A multimeter can also help diagnose electrical issues in your stove.
Clear your workspace by unplugging the stove and pulling it away from the wall. Create a clean, well-lit area with enough room to maneuver. Lay down a protective drop cloth or cardboard to catch any small parts or prevent surface scratches. Have a small container nearby to organize screws and components as you disassemble the stove.
Pro tip: Always take photos of your stove’s interior and component layout before disassembly. These reference pictures can be lifesavers when you need to remember exactly how everything connects during reassembly.
The following table summarizes essential tools needed for safe and efficient stove repairs:
| Tool | Purpose | Safety Benefit |
|---|---|---|
| Adjustable wrench | Loosen and tighten fittings | Prevents tool slips |
| Phillips/flathead screwdriver | Remove or fasten screws | Minimizes hand injury risk |
| Pliers | Grasp and hold components | Enhances control, reduces slips |
| Multimeter | Diagnose electrical issues | Prevents accidental shorts |
| Work gloves | Protect hands from sharp edges | Reduces cuts or abrasion |
| Safety glasses | Shield eyes from debris | Prevents eye injuries |
Step 2: Diagnose Common Stove Issues Safely
Before attempting any repairs, understanding how to safely diagnose your stove’s problems is crucial. This step will help you identify potential issues while maintaining personal safety and preventing further appliance damage.
Start by conducting a visual and functional inspection. Kitchen safety guidelines recommend maintaining a cautious approach when examining kitchen appliances. Check for visible signs of wear like frayed electrical cords, rust, or damaged heating elements. Listen for unusual sounds during operation such as clicking, buzzing, or grinding that might indicate internal problems.
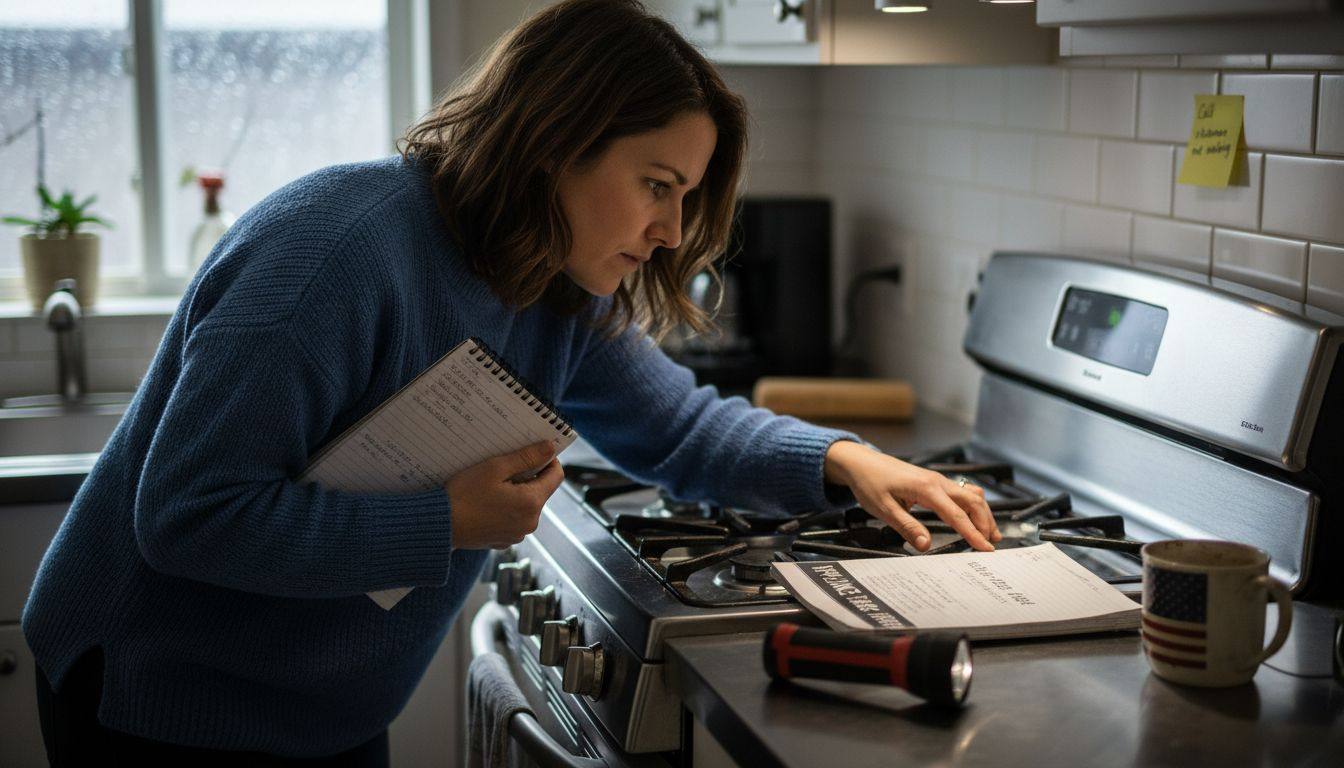
Next, systematically test different stove functions. Verify if burners are heating evenly, check the ignition system for consistent spark, and observe flame color. A steady blue flame suggests proper gas mixture, while yellow or orange flames might signal potential ventilation or gas flow issues. Remember to unplug the stove or switch off the circuit breaker before conducting any detailed inspections to ensure electrical safety.
Pro tip: Always keep a fire extinguisher nearby when diagnosing stove issues, and never attempt repairs if you smell gas or suspect significant electrical problems.
Here’s a quick reference comparing common stove problems and their likely causes:
| Symptom | Possible Cause | Recommended Action |
|---|---|---|
| Burner won’t light | Faulty igniter or switch | Inspect igniter, replace if needed |
| Uneven heating | Damaged burner or coil | Check and replace burner or coil |
| Unusual flame color | Poor gas flow or blocked port | Clean ports, check regulator |
| Stove won’t power on | Blown fuse or faulty power cord | Examine fuse, test cord |
| Clicking sound | Moisture in igniter | Dry and test igniter |
Step 3: Replace Faulty Components or Clean Parts
Replacing damaged stove components and thoroughly cleaning critical parts will restore your appliance’s performance and extend its operational life. This step requires careful attention to detail and systematic approach.
Appliance maintenance guidelines recommend inspecting and replacing degraded components that compromise functionality. Begin by examining key areas like heating elements, igniters, and gaskets. For electric stoves, look for signs of wear on burner coils such as discoloration, warping, or uneven heating. Gas stoves require careful inspection of burner ports and ignition systems for blockages or corrosion.
Carefully remove the problematic component using appropriate tools. Take photographs before disassembly to ensure correct reinstallation. Clean surrounding areas with appropriate cleaning solutions designed for kitchen appliances. When replacing parts, always use manufacturer recommended components or direct equivalents to maintain safety and performance standards.

Pro tip: Always disconnect power or gas supply before removing any stove components, and keep all removed screws and small parts in a magnetic parts tray to prevent losing critical hardware.
Step 4: Reassemble and Test Stove Functionality
With components replaced and cleaned, your final task is carefully reassembling the stove and conducting a comprehensive functionality test. This critical stage ensures your repair work restores the appliance to safe and efficient operation.
Kitchen safety recommendations emphasize the importance of systematic appliance testing after any repair work. Begin by methodically replacing each component in the reverse order of disassembly. Double check your reference photographs to confirm correct positioning. Ensure all connections are secure and components are seated properly before reconnecting power or gas supply.
Slowly reactivate the stove and monitor its performance. Test each burner individually checking for consistent flame height, even heating, and smooth ignition. For electric stoves, verify each heating element warms uniformly without sparking or unusual sounds. Listen carefully for any irregular noises and observe flame color and stability on gas models. If everything functions correctly, your repair is successful.
Pro tip: Run the stove at different heat settings for at least 15 minutes during initial testing to ensure comprehensive performance verification and catch any potential lingering issues.
Get Reliable Stove Repairs from Local Experts You Can Trust
Dealing with a malfunctioning stove can be frustrating and risky. Whether you face uneven heating, faulty igniters, or electrical issues, expert guidance is crucial to avoid safety hazards and protect your home. This article highlights key challenges like diagnosing burner problems, replacing damaged components, and ensuring safe reassembly to keep your stove running smoothly.
For homeowners in Marlboro, NJ, and Monmouth County looking for fast, trustworthy solutions, Expert Appliance offers same-day stove repair services with upfront pricing and 24/7 emergency support. Our experienced technicians handle everything from igniters to heating elements to restore your stove’s performance safely and efficiently.

Don’t wait until a small issue becomes a major repair. Visit our Appliance Archives to learn more about our service offerings or schedule your stove repair today at Expert Appliance. Trust local professionals who have served NJ communities since 1988 to get your stove working like new again.
Frequently Asked Questions
What tools do I need for stove repairs?
You will need essential tools such as adjustable wrenches, screwdrivers (both flathead and Phillips), pliers, and a multimeter. Gather these tools before starting your stove repairs to ensure you can work efficiently and safely.
How can I safely diagnose stove issues?
Begin by visually inspecting your stove for any signs of wear, such as frayed cords or rust. Then, test each burner individually to check for even heating and listen for unusual sounds during operation, ensuring to unplug the stove before detailed inspections.
What should I do if a burner won’t light?
If a burner won’t ignite, the issue may lie with a faulty igniter or switch. Start by inspecting the igniter for damage and replacing it if necessary, and ensure the gas flow is not blocked.
How do I replace faulty stove components?
To replace faulty components, carefully remove the affected parts using your tools and take photographs for reference. Install new or cleaned components by following the reverse order of disassembly, ensuring everything is secured properly.
What steps should I follow after reassembling my stove?
After reassembly, reconnect the power or gas supply and conduct a thorough functionality test by checking each burner for performance. Run the stove for at least 15 minutes to verify there are no lingering issues and monitor for any unusual sounds or flames.
How can I maintain my stove after repairs?
Regularly clean and inspect your stove to prevent future issues. Schedule maintenance checks every few months to identify and address potential problems early, which can help extend the life of your appliance.
Recommended
- Open Repair | Stove Repair | Appliance Repair Service
- How to Repair Refrigerator: Step-by-Step Guide for Fast Results – Expert Appliance
- 7 Essential Types of Appliance Repairs for Every Homeowner – Expert Appliance
- 7 Essential Emergency Appliance Repair Tips for Homeowners – Expert Appliance
- Roof Repair Guide: Step-by-Step Fixes for Homeowners – J. A. Kelly Contracting Services